【Made With IceWhale Community】Breadboarding a ZimaBlade NAS with Lego Duplo
Maker: George Michaelson, an anglo-australian computer scientist working in the not-for-profit sector, with over 40 years of research and systems administration experience in UNIX systems, networks, international standards.
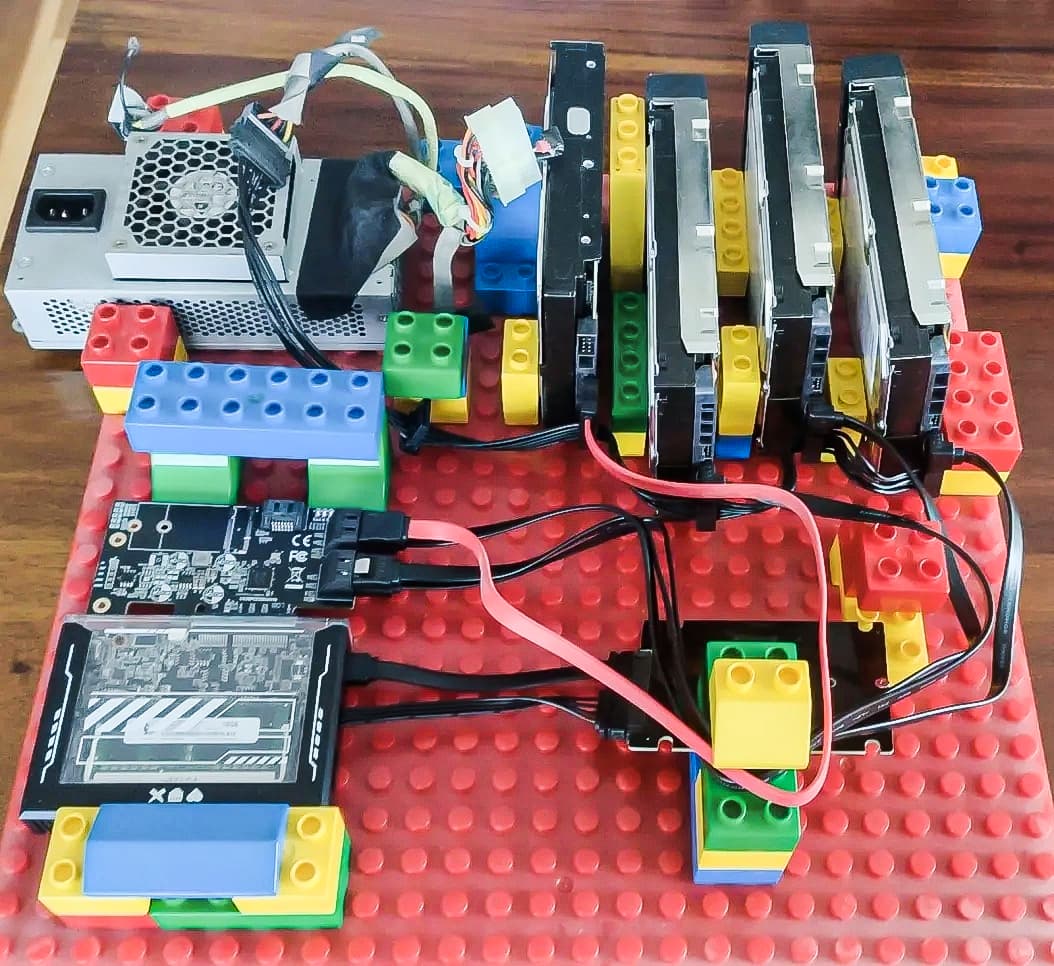
In this blog post, I decided to explore the possibility of building a NAS (Network-Attached Storage) using my ZimaBlade and other components, without investing in a dedicated case. My aim was to understand how the various parts would fit together and verify if the setup would work effectively. This approach proved successful, offering a quick and easy solution. The primary motivation for building this NAS was to replace my existing, noisy NAS setup and create a quieter, more flexible system that would facilitate audio recording in my home office.
Why Breadboarding?
“Breadboarding” is a well-established practice in electronics. Nowadays, pre-made boards with power rails, a ground plane, and a grid of holes are used to accommodate various electronic components. These boards serve as reusable PCBs, allowing for easy assembly and testing of circuits before integrating them into the final product. The term “breadboarding” originated from the use of wooden planks as makeshift boards, which led to its association with kitchen breadboards. However, it’s important to note that using actual breadboards for electronics experimentation is not recommended!
I chose to employ a breadboard-like setup because I needed a sturdy and electrically isolated platform to hold the components securely and avoid any short circuits or unwanted electrical contact.
Why Duplo?
In my home office, I had some Lego Duplo blocks left over from my child’s earlier years. These blocks, which are over 25 years old, occasionally resurface during playtime with friends’ young kids or for creative endeavors like animating Lego using chocolate wrappers during Easter. The Lego Duplo blocks, made of solid and non-conductive plastic, provided an ideal foundation for this project. They offered stability, electrical neutrality, and the versatility of Lego/Duplo’s grid structure for restraining objects, organizing cables, and ensuring proper airflow around the components. Additionally, the use of Lego Duplo added an element of fun and whimsy to the project.
The Parts
For this setup, I utilized the following components:
-
A 4-core Zimablade
-
The provided 12V USB-C power supply by Zima
-
A USB-C hub with power and HDMI capabilities
-
The provided 16GB memory module (difficult to find elsewhere at such a great price)
-
1 SATA connector for power and data transfer
-
1 M.2 SSD to SATA carrier card
-
The provided 5-port PCI SATA card by Zima
-
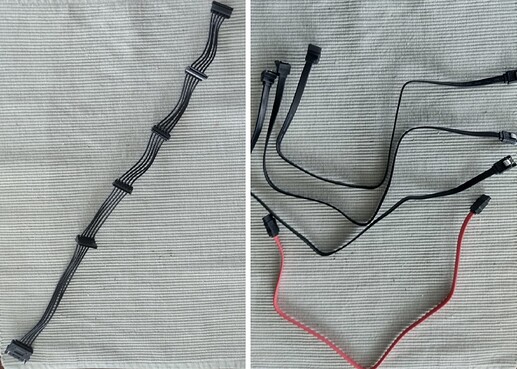
A 5-device SATA power cable with a male connector to fit my PSU’s SATA line
-
4 SATA data cables (included with the PCI card)
-
An ATX compatible PSU with a 24-pin plug and at least one SATA power connector. I opted for a small form factor DPS 250AB-53A PSU, delivering 250W of power output, capable of supplying 17A on the 12V SATA power lines and 12A on the 5V power lines (if utilized)
-
4 spare 3.5" HDDs (1TB each) for configuration testing and runtime behavior evaluation before dismantling my current Raspberry Pi4 NAS setup.
Hot-wiring an ATX Power Supply
By default, an ATX 24-pin PSU requires pin 4 to be connected to any of the COM pins on the plug. They are pins 3, 5, 7, 15, 17, 18, 19 and pin 24. Pin 4 is usually the green cable, and the others are black. They’re gound. People often pick pins 4 and 5.
While there are specific components available for this purpose, some of which even include a switch, I initially employed a paperclip with shrink-tube insulation and gaffa tape to bridge the necessary pins. This makeshift solution worked perfectly, immediately spinning up the fan. It’s worth noting that due to this setup, all the disks will be powered independently of the ZimaBlade. Although I would prefer a single on-off switch for the entire system, this configuration necessitates either finding a double-throw power switch, power cycling the connected plugs, or identifying a pin on the ZimaBlade that can trigger the proper state on the 24-pin plug to activate the PSU. In the future, I may consider using a “picoPSU” and wiring it accordingly.
Initial Findings
During the initial testing phase, I successfully verified that all the components fit and functioned as expected. I seamlessly connected a keyboard and monitor to the ZimaBlade, configured the Zima BIOS, and bootstrapped the operating system on the MMC. Additionally, I attached the M.2 SSD via the SATA ports on it and used a USB stick with an ISO file to install the desired OS on the M.2 drive. This allowed me to disable the MMC memory entirely in the BIOS and set the M.2 drive as the primary boot option in EFI. The configuration worked flawlessly.
With the M.2 drive in place, I proceeded to connect the PCI card and cable the drives. I ensured the drives were securely positioned and provided adequate airflow by utilizing Duplo blocks. These blocks not only facilitated stability but also aided in cable management, preventing tangles and accidental disconnections.
Once the drives were connected to the PSU, I proceeded to mount the PSU onto the board and wired it to the drives. With all components properly assembled, I powered on the system. Prior to activating the PSU, I ensured that the ZimaBlade recognized the PCI card, the SSD boot/OS disk, and the Ethernet connection. Upon powering on the PSU, the drives spun up immediately, becoming seamlessly visible to the NAS OS. I successfully configured the disks and established them as an exposed ZFS filesystem.
Choosing a NAS software package: TrueNAS Core
Because of my continuous use of BSD based operating systems from the 1980s I’ve developed an abiding interest in the BSD ecosystem. While I frequently utilize Linux distributions like Debian and Ubuntu, I decided to put TrueNAS Core to the test for this project, as it is built on FreeBSD 13. Although the ZFS filestore in my Pi4 NAS runs on Ubuntu, I was keen to explore things like the ZFS feature flag support in BSD. Having migrated filestores multiple times between FreeBSD and Debian installs I was particularly intrigued by the jails model and bhyve, both of which are prominently featured in TrueNAS Core. Hence, opting for TrueNAS Core was a logical choice.
Although Linux-based solutions offer certain advantages, such as the Docker system, which I find more user-friendly and better packaged than BSD Jails (although BSD Jails are highly performant and fast), my inclination towards BSD influenced my decision. With over 40 years of experience with BSD, I am confident in my ability to run the systems I care about on this platform. This includes my current Plex server, which operates flawlessly on the Pi4 NAS.
It’s worth noting that TrueNAS Core is now probably less popular than the Linux version (TrueNAS Scale) and may get less attention for updates. It doesn’t support Docker or LXD directly for instance. If future support requirements necessitate a significant upgrade, I will need to reevaluate my options, considering either migrating to TrueNAS Scale or adopting another home NAS OS capable of reading and importing ZFS filesystems. The services I currently run in Jails or Bhyve VMs can be easily transitioned to Docker or other Linux VM models, potentially providing me with more recent and supported versions.
What’s next?
Having achieved my primary objective and established confidence in the functionality of this NAS, my next step involves collaborating with a friend who possesses a 3D printer. He has kindly agreed to print an existing design of a holder to accommodate all four drives and determine the optimal integration with a box or cage for the ZimaBlade, PCI card, M.2 on SATA card, and the compact PSU. The intention is to house these components within a suitable case, which may incorporate a fan (considering the remarkably quiet Noctua fan I possess) if I can manage the PWM fan controls using the available data lines.
A suitably designed plastic or metal case, slightly larger than my Radxa system but smaller than a full-size or desktop PC, will sufficiently serve the purpose. As the prices of SSDs decrease, I may consider replacing the current four 2.5" HDDs with SSDs. Furthermore, I will retain the Raspberry Pi 4 system used with the radxa board to experiment with, providing an additional avenue for exploration and tinkering.
Through this process, I discovered that the 2.5" drives tend to generate considerable heat. While my initial desire was to create a fanless build, it is becoming increasingly apparent that I may need to incorporate some form of active cooling for the disks. I envision utilizing a quieter, slower, yet larger fan to achieve optimal thermal management. Looking ahead, I remain hopeful that future SSD models will exhibit improved cooling characteristics or enable passive cooling through the utilization of effective heatsinks.


