Hello fellow ZimaOS and Zimaboard enthusiasts!
I’ve noticed that while the ZimaOS community and the Ice-whale team provide excellent support, finding clear, organized, and detailed installation guides can sometimes be a challenge. For those of us who prefer a straightforward, step-by-step approach, especially when tackling those small, often frustrating, technical hurdles, this guide is designed for you. This article is the second in a series I’m developing on ZimaOS and Zimaboard, and I sincerely hope you find it helpful.
This guide focuses on installing Paperless-ngx with its essential functions for home use, accessible within your local network or a Tailscale network. If your intention is to expose your Paperless-ngx instance to the public internet, some of the configurations outlined below may need adjustment.
I performed this installation on a Zimaboard 2 with the following specifications:
- CPU: Intel(R) N150 4 Cores 2.90 GHz 4 Threads
- RAM: 16 GB 6400 MHz LPDDR5
- GPU: Intel Corporation Alder Lake-N [Intel Graphics]
- Operating System: ZimaOS v1.5.3 Plus
Let’s get Paperless-ngx installed!
Step 1: Accessing the App Store
- Sign in to your ZimaOS web interface.
- Navigate to the App Store.
Step 2: Finding and Selecting Paperless-ngx
- In the App Store’s search bar, type Paperless-ngx.
- Select Paperless-ngx (BigBearCasaOS) from the search results.
Step 3: Custom Installation
- Locate the Install button. Instead of clicking it directly, click the small down arrow next to it.
- Select Custom Install.
Step 4: Crucial Configuration Before Installation
This is the critical phase where we set up the essential parameters for Paperless-ngx to function correctly.
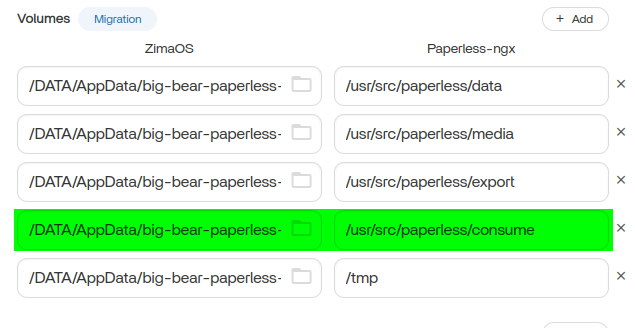
Under the Volumes section, make the following changes. (If you prefer the default settings, you can leave them unchanged. See the image below for reference.)
- Set custom Volume path for /usr/src/paperless/consume: It is highly recommended to define a specific, user-friendly path for your consumption folder. This makes managing your documents much easier.
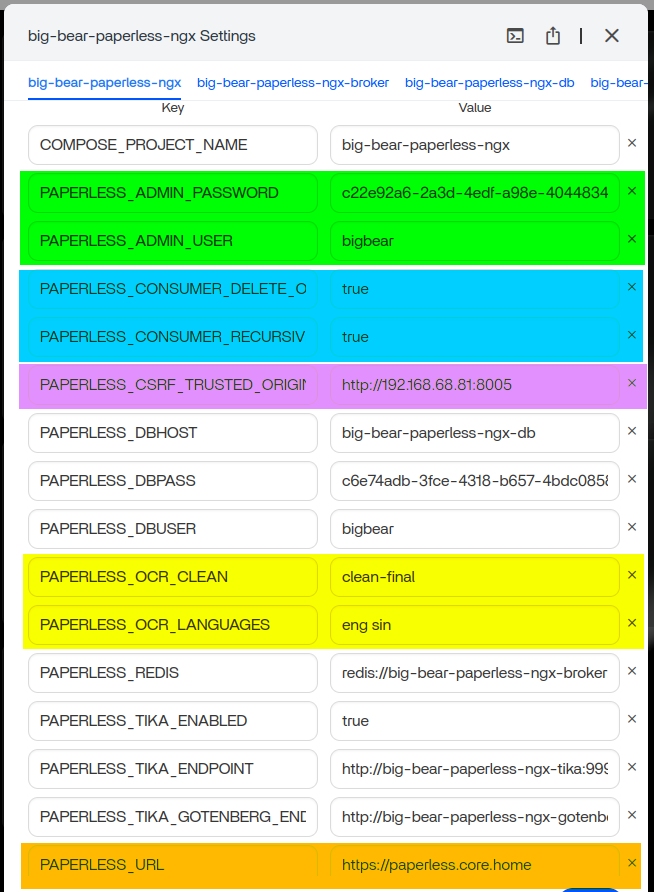
Add the following environment variables. (See the image below for reference.)
- PAPERLESS_ADMIN_USER: Change the default value to your preferred administrative username.
- PAPERLESS_ADMIN_PASSWORD: Change the default value to your preferred administrative password.
- These parameters will create your administrative account upon installation.
- PAPERLESS_CONSUMER_DELETE_ORIGINALS: true:
- This parameter enables automatic deletion of files from the /consume folder after they have been processed and absorbed into Paperless-ngx.
- PAPERLESS_CONSUMER_RECURSIVE: true:
- This parameter enables recursive consumption of files within the /consume folder, meaning it will process subfolders and their contents.
- PAPERLESS_OCR_CLEAN: clean-final:
- PAPERLESS_OCR_LANGUAGES: <3-letter code for OCR support languages separated by spaces (e.g., eng sin)>:
- These configurations enable basic, necessary OCR functions for Paperless-ngx. However, the specific clean-final setting and the desired OCR languages will need to be further enabled and configured within the Paperless-ngx graphical user interface (GUI) after installation.
- PAPERLESS_CSRF_TRUSTED_ORIGINS: http://your_server address:port
- PAPERLESS_URL: http://your_server address:port
- These configurations are critical. Do not include a trailing slash (/) at the end of the URLs. Incorrectly setting these parameters will result in a “Forbidden (403) CSRF verification failed. Request aborted” error message when you attempt to sign in.
- Note: Replace with the IP address or hostname of your Zimaboard (e.g., 192.168.1.100 ). Replace with the port Paperless-ngx will use (often 8000 by default, but you can verify this in the ZimaOS App Store configuration).
Keep all other settings unchanged.
Double-Check: Before proceeding, meticulously review all your settings. Once you are confident that all parameters are correct, click the Install button.
Post-Installation Configuration and Operation
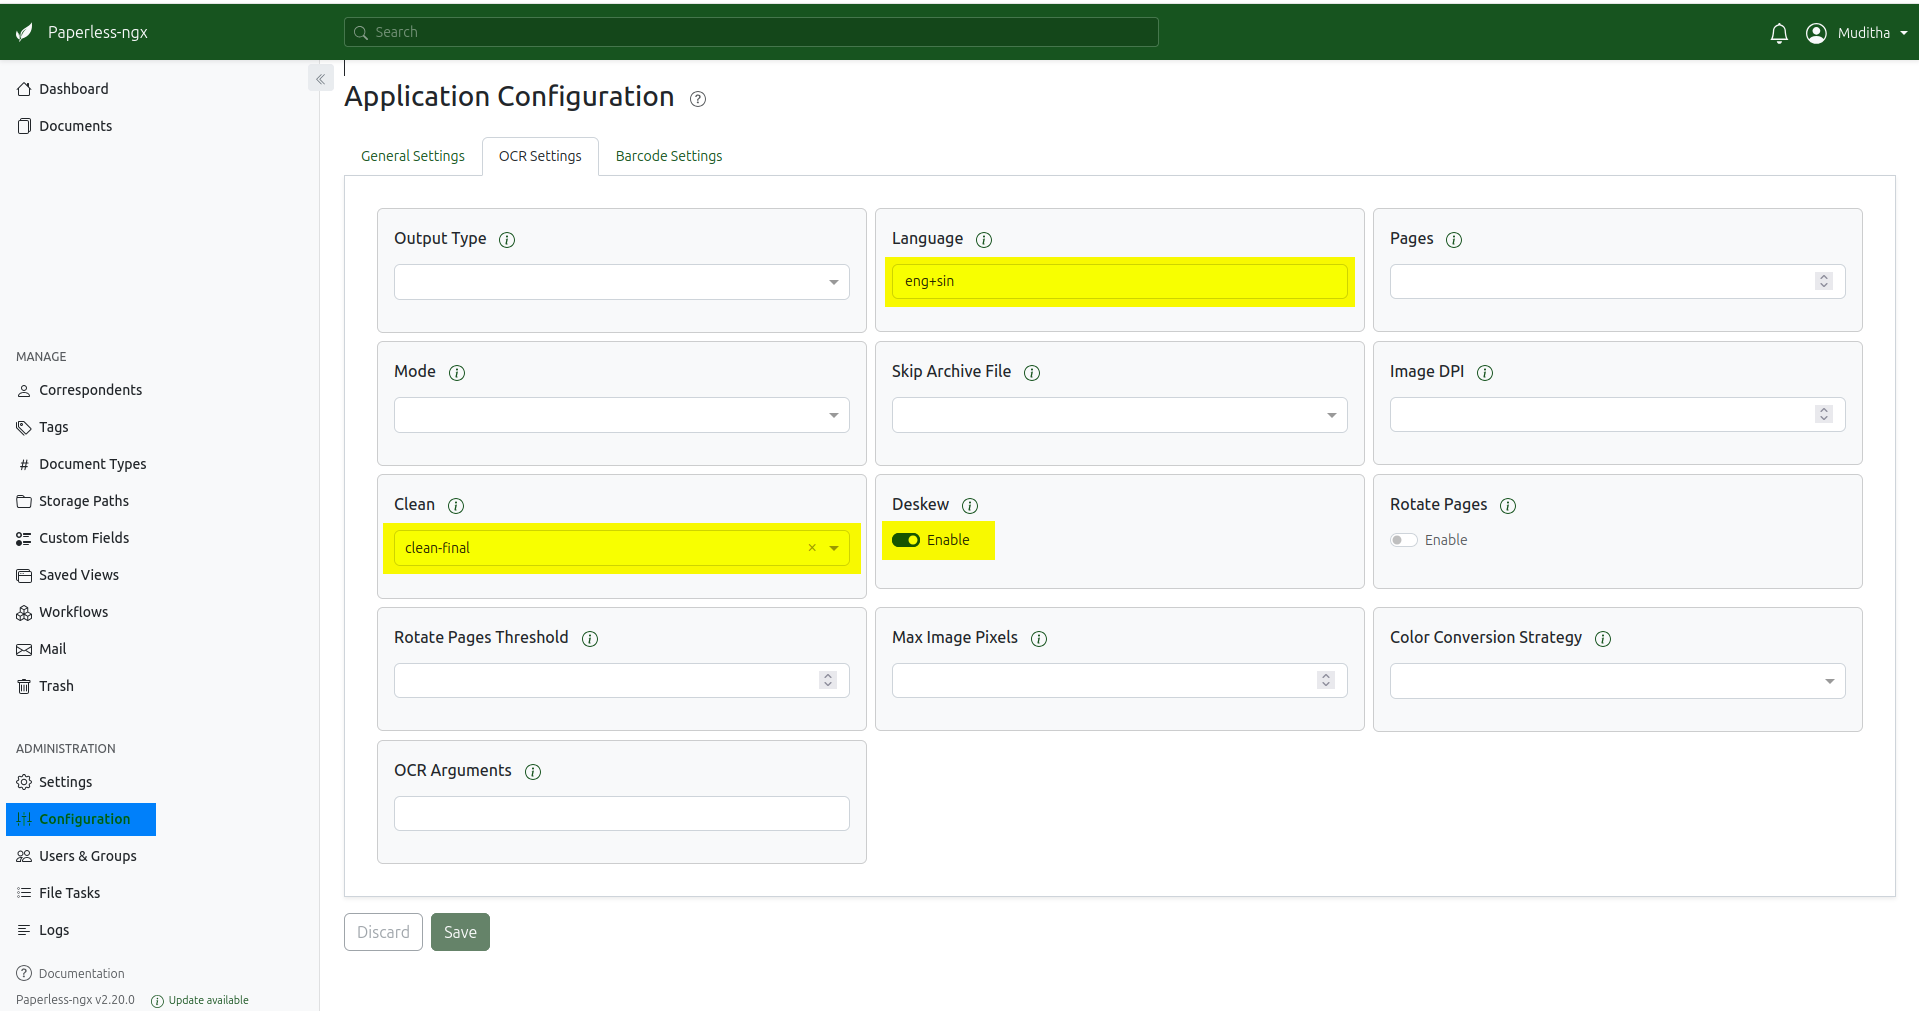
After installation, sign in to your Paperless-ngx interface and configure the OCR settings as follows:
- Navigate to Application Configuration —> OCR Settings.
- Set Clean to clean-final.
- Enable Deskew.
- Set Language to the 3-letter codes for your desired OCR support languages, separated by a plus sign (+) (e.g., eng+sin).
- Click Save.
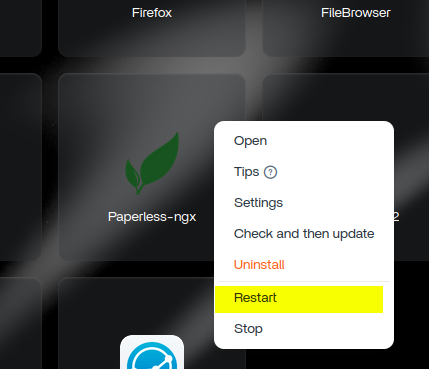
Next, return to the Application Dashboard on ZimaOS and restart Paperless-ngx.
Important Operational Note: Whenever you add a large batch of documents to your /consume folder for processing, it is advisable to restart Paperless-ngx. Failing to do so may lead to file permission issues and hinder document processing. Alternatively, you can upload documents directly through the Paperless-ngx GUI, which typically does not require a restart.