This guide will show you how to install new cooling solution for ZimaCube
What you received:
-
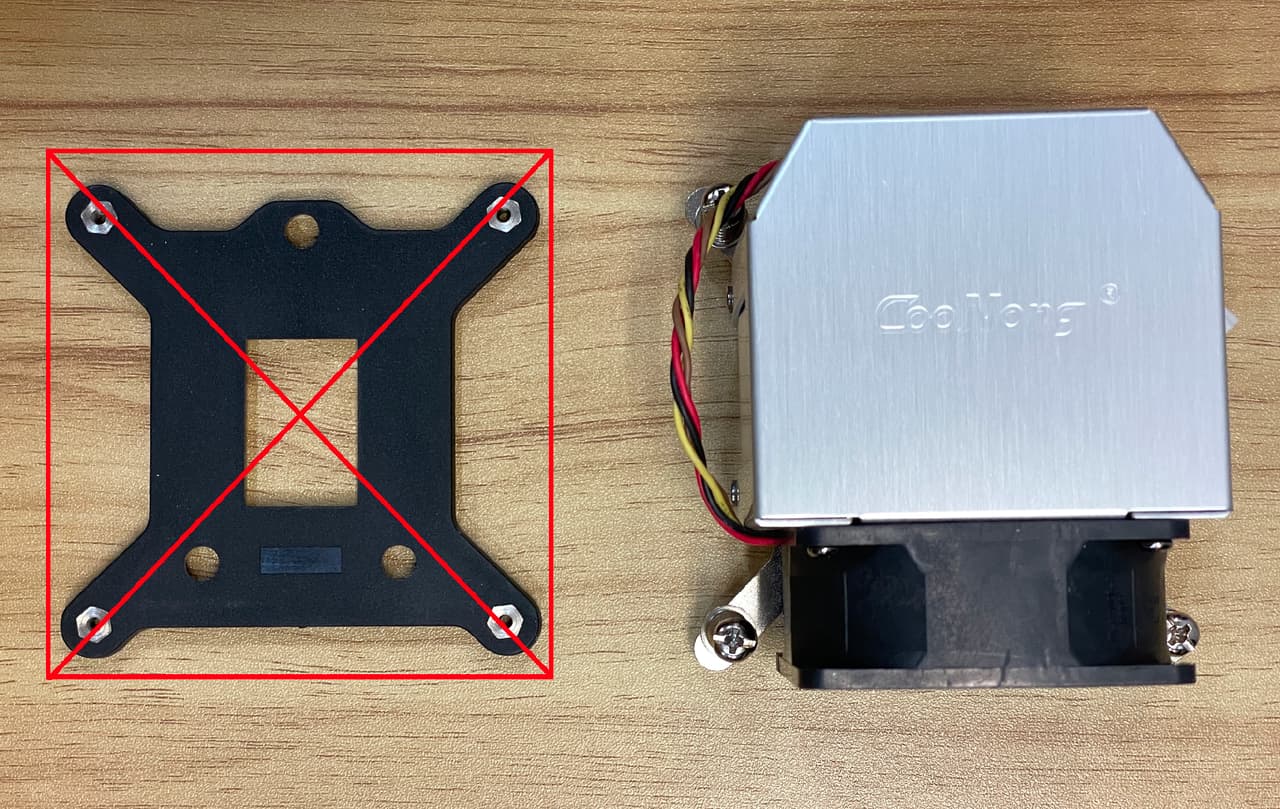
Heat sink with cooling fan x1
-
Back panel x1
Note: Back panel is not required during this fan replacement process.
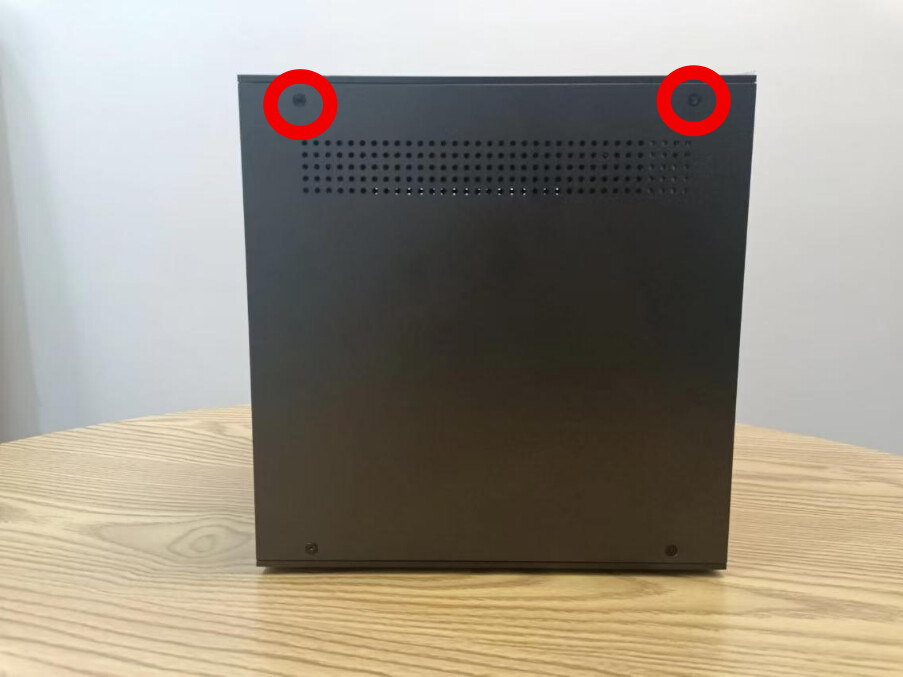
Step 1,Open cover
- Remove the four bolts from the top cover
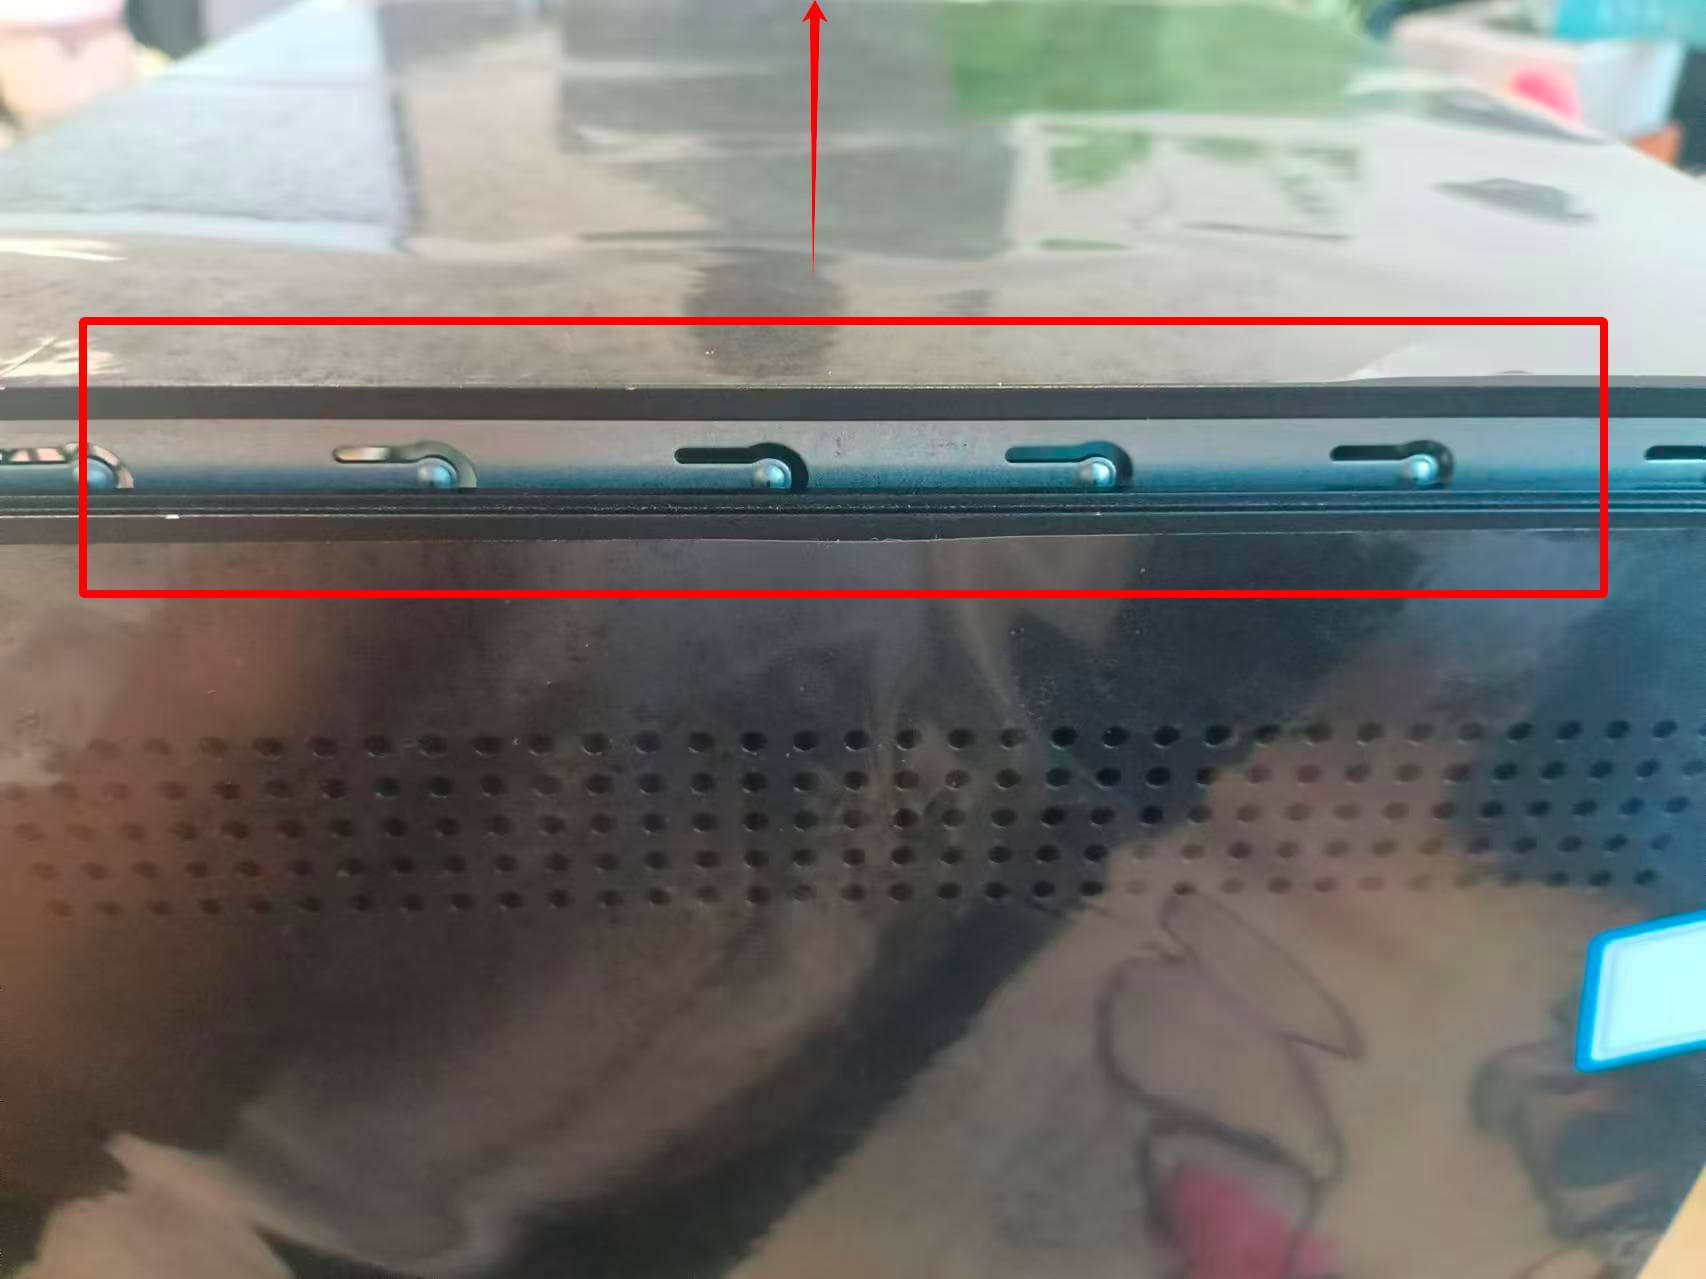
- Gently lift the top cover of the chassis.
Step 2, Remove the original radiator
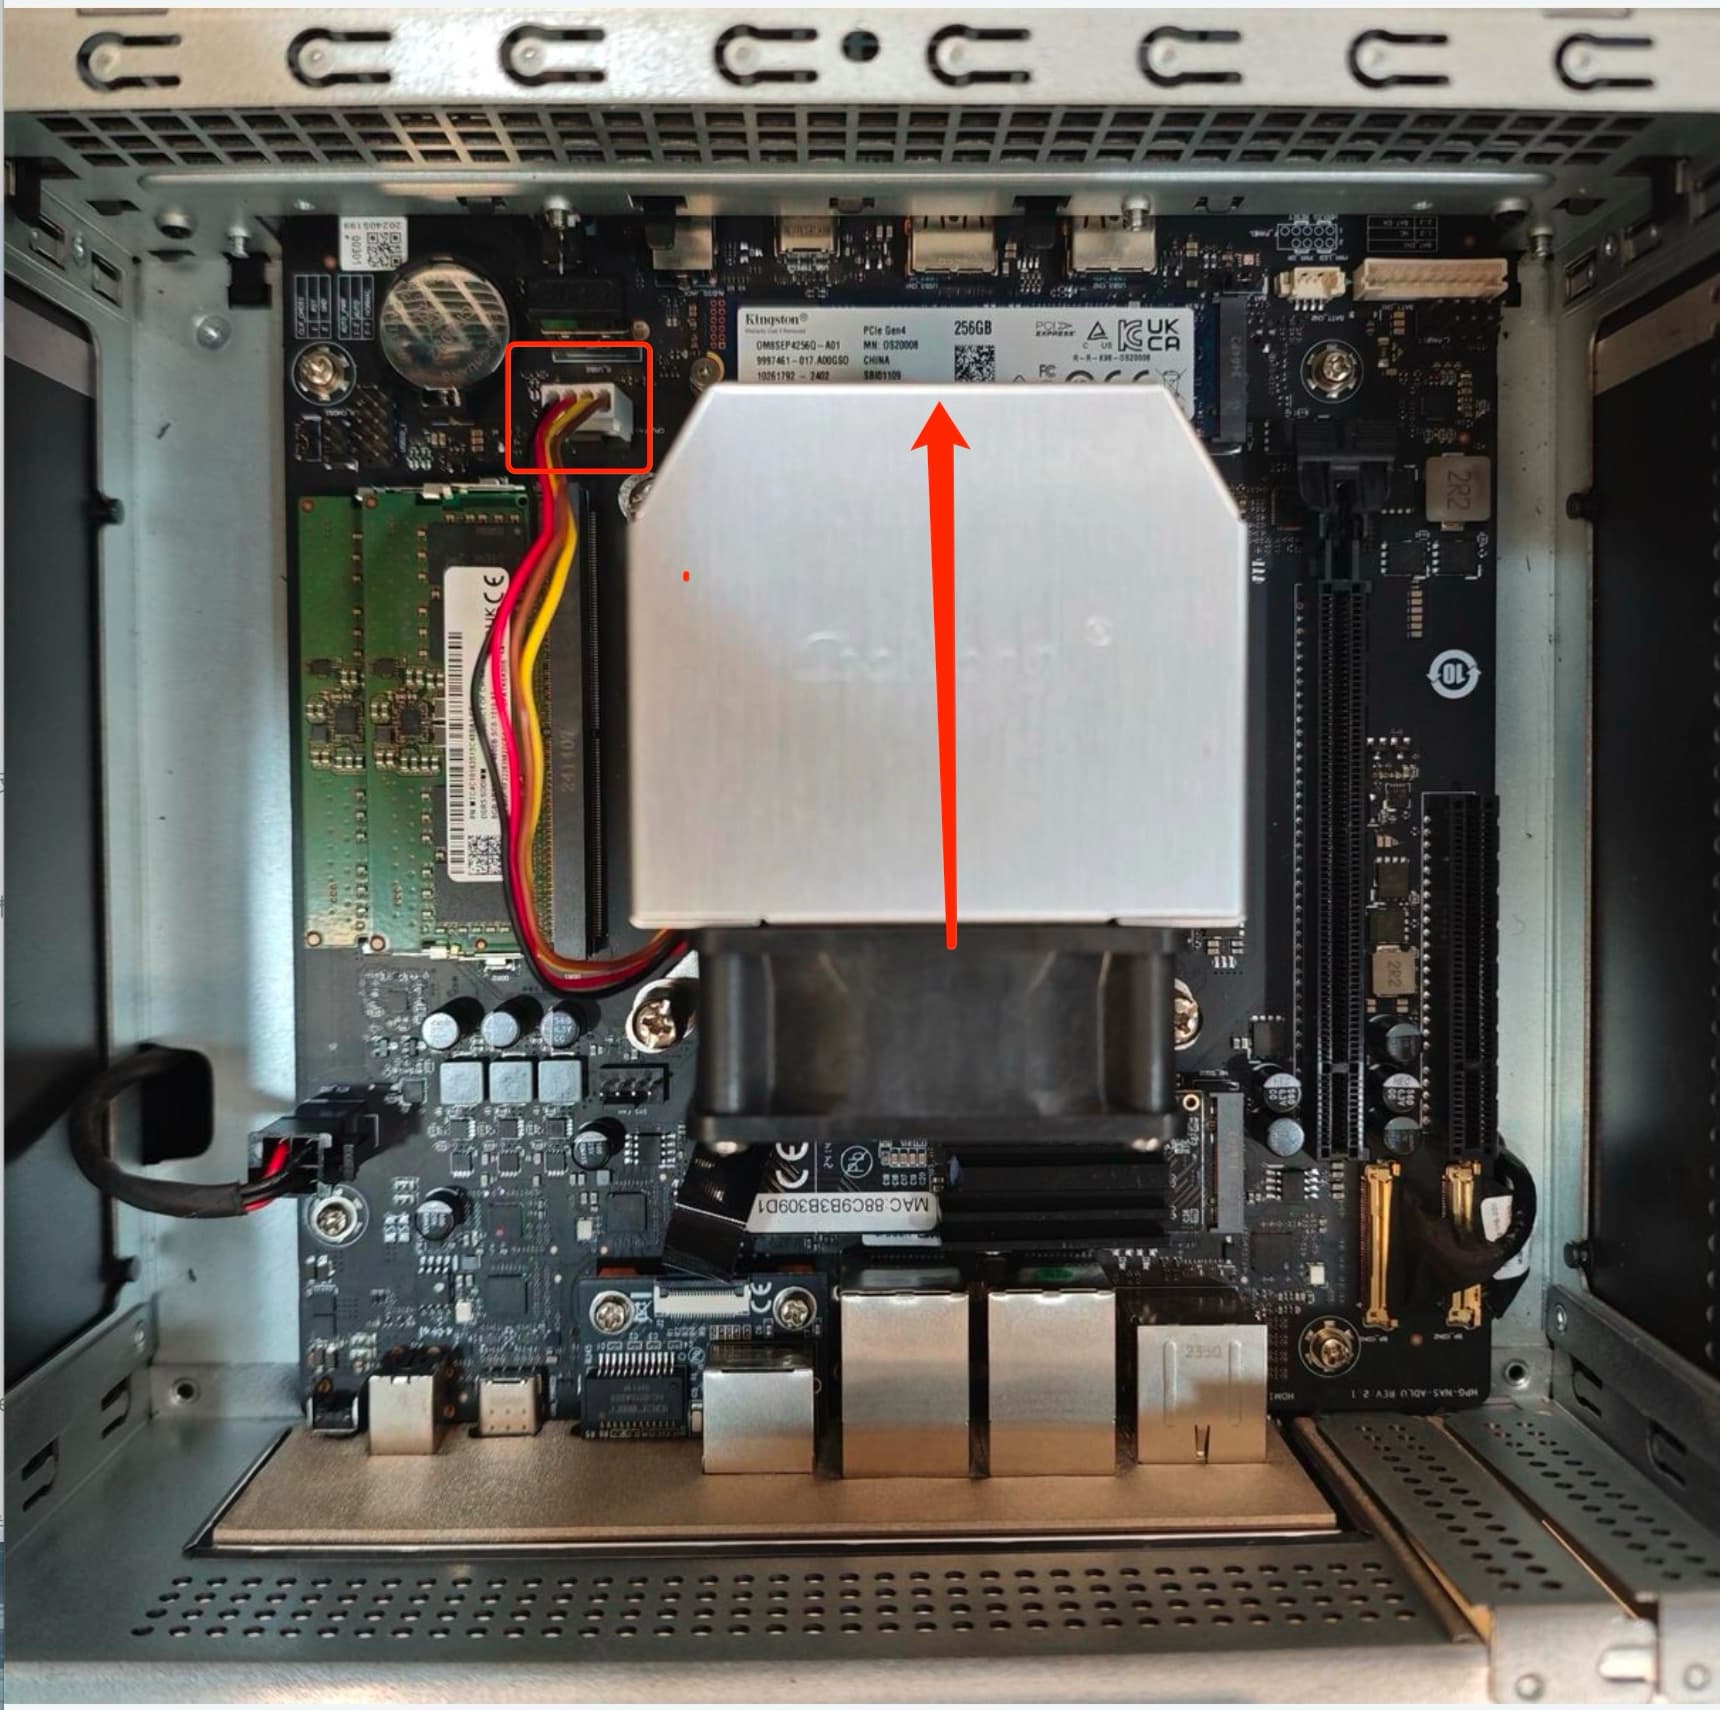
- First, disconnect the fan from the main board.
- Use a cross screwdriver to rotate counterclockwise and unscrew the screws at the four corners of the fan.
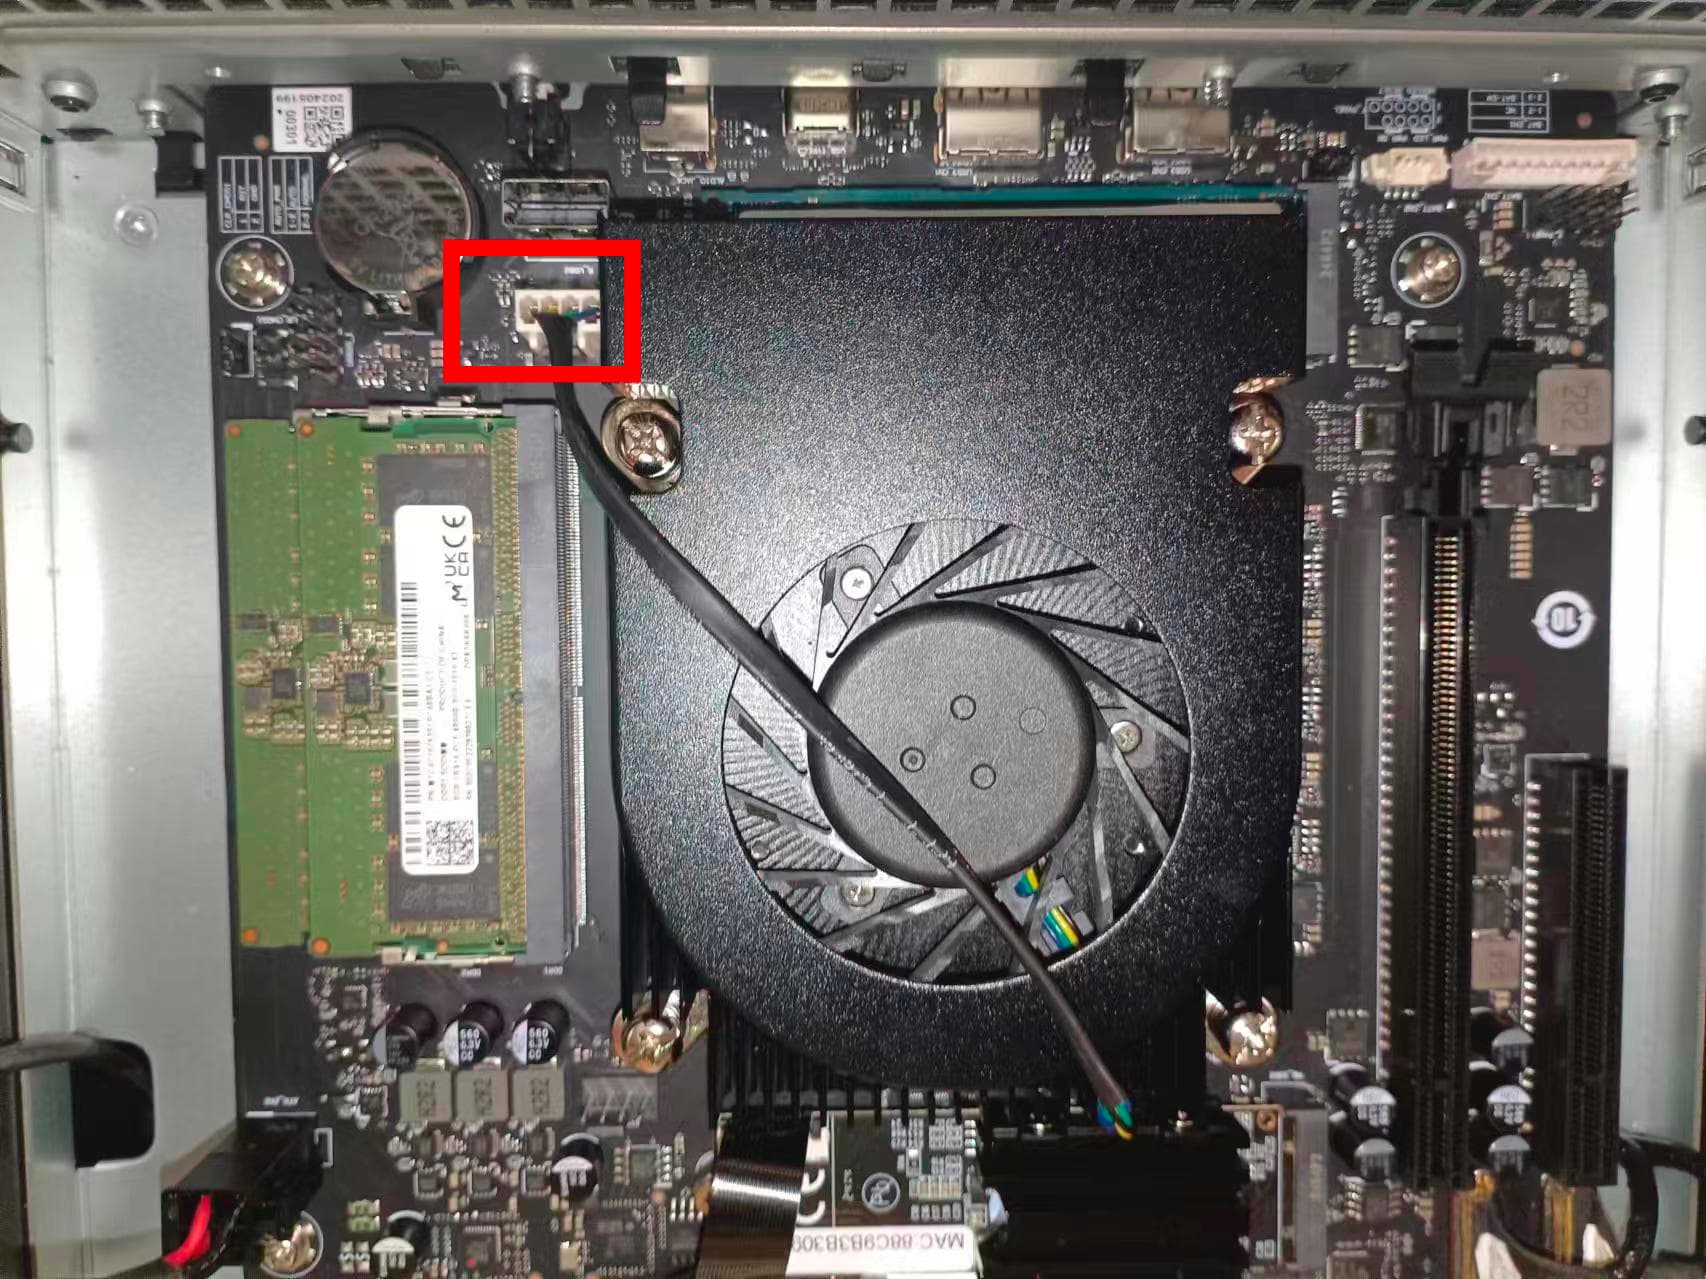
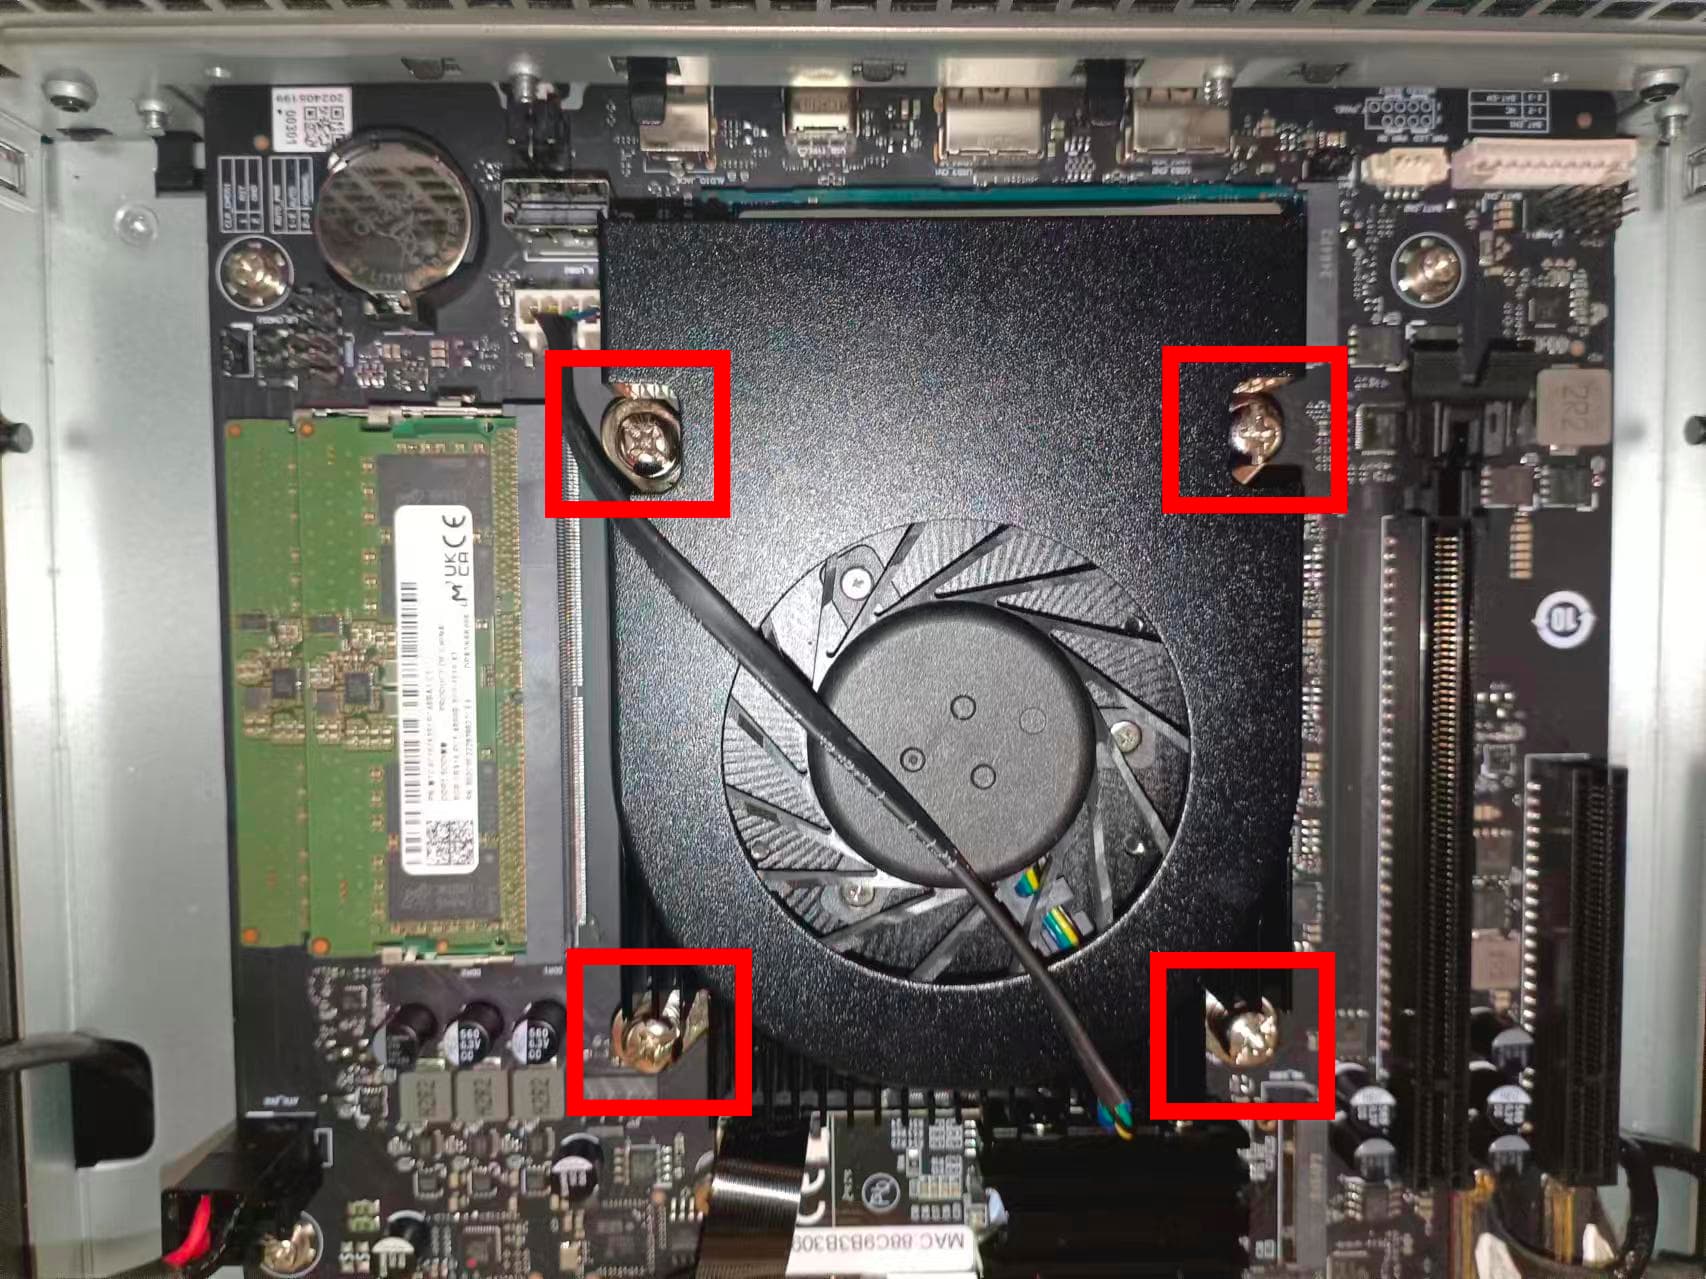
- Then, carefully remove the original cooling fan upwards.
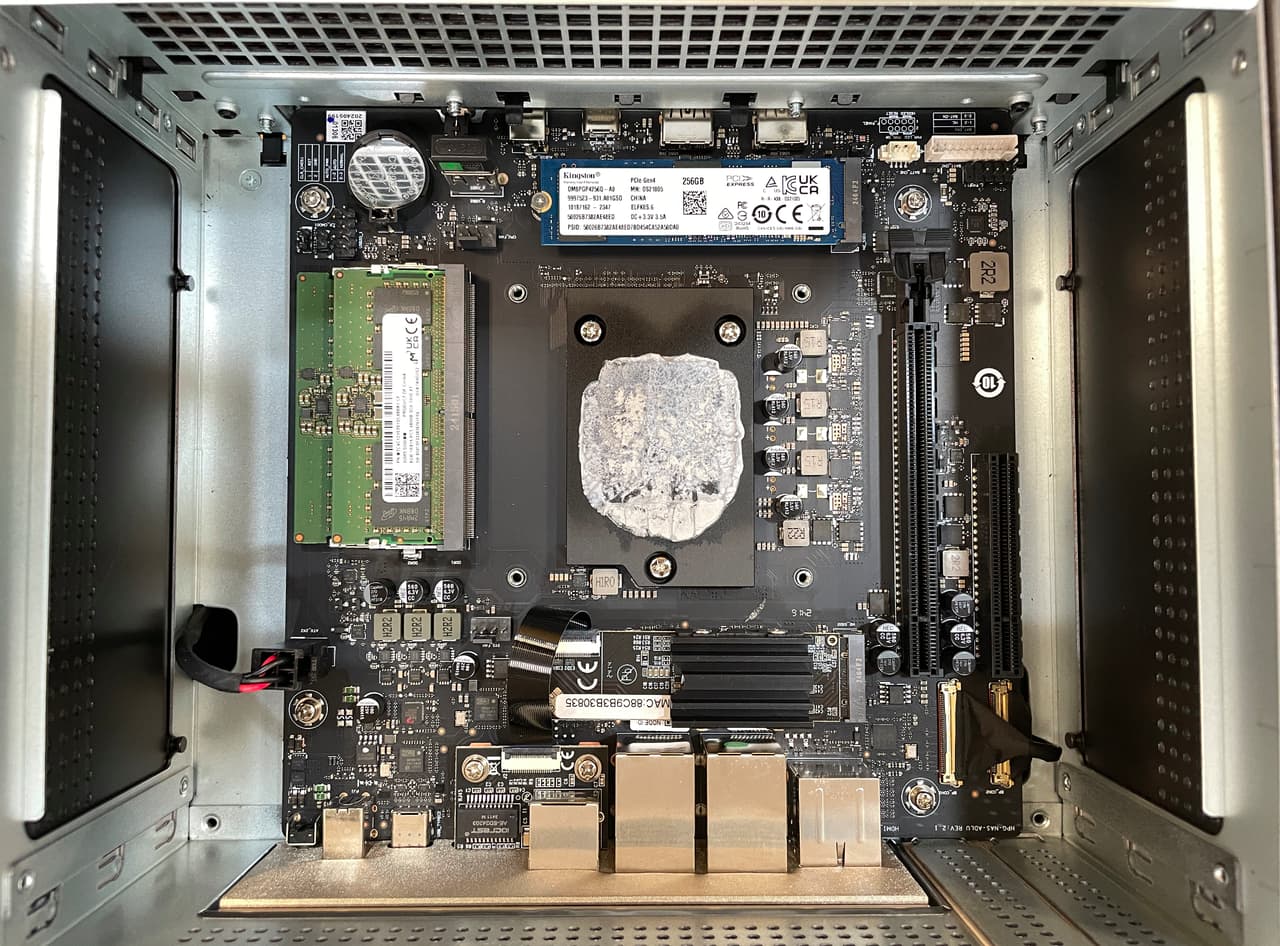
Note: Please do not remove the black block, it protects the CPU and raises the contact surface.
Step 3, Install new radiator
- Align the heat sink fins of the new heatsink with the front panel of the ZimaCube, making sure the fan is placed facing the back panel .
tips:The new radiator has been pre-coated with silicone grease, no additional application is required.
- Align the bolt holes on the main board and use the bolts to secure the new radiator to the main board.
- Then, Connect the power cord for the heatsink to the 4-pin connector on the main board.
- Install the cover plate and tighten the four bolts on both sides of the cover plate.
- Fan replacement complete
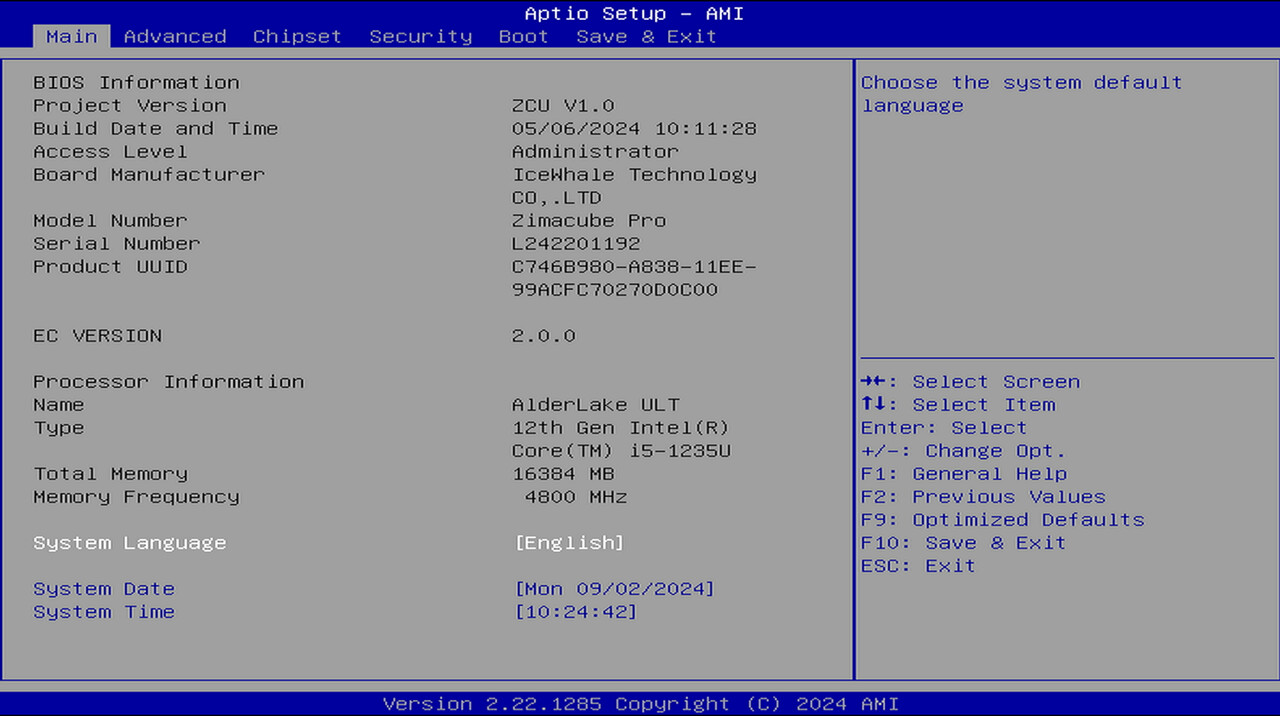
Step 4, BIOS fan settings
- Connect ZimaCube to the keyboard, press the “Delete” key continuously during startup to enter the BIOS.
- Select the “Advanced” option.
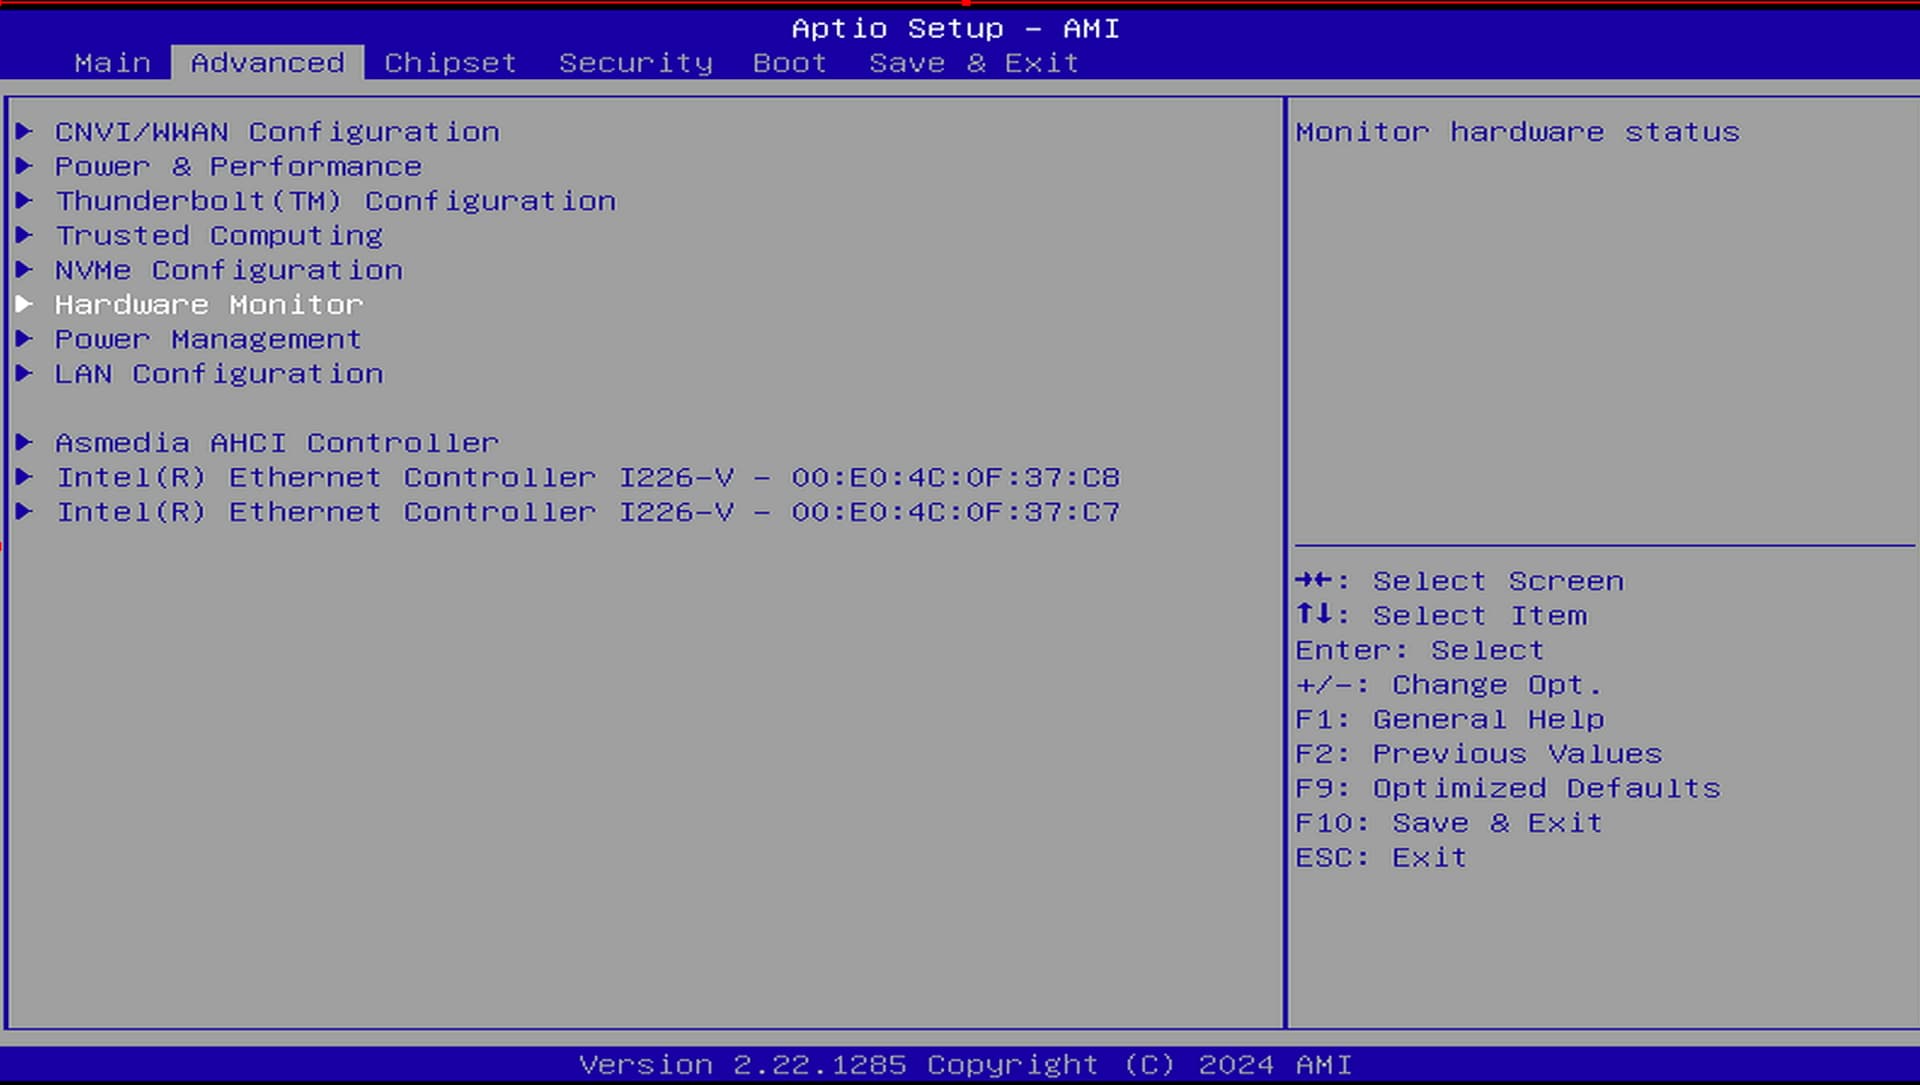
- Select “Hardware Monitor” and press Enter.
-
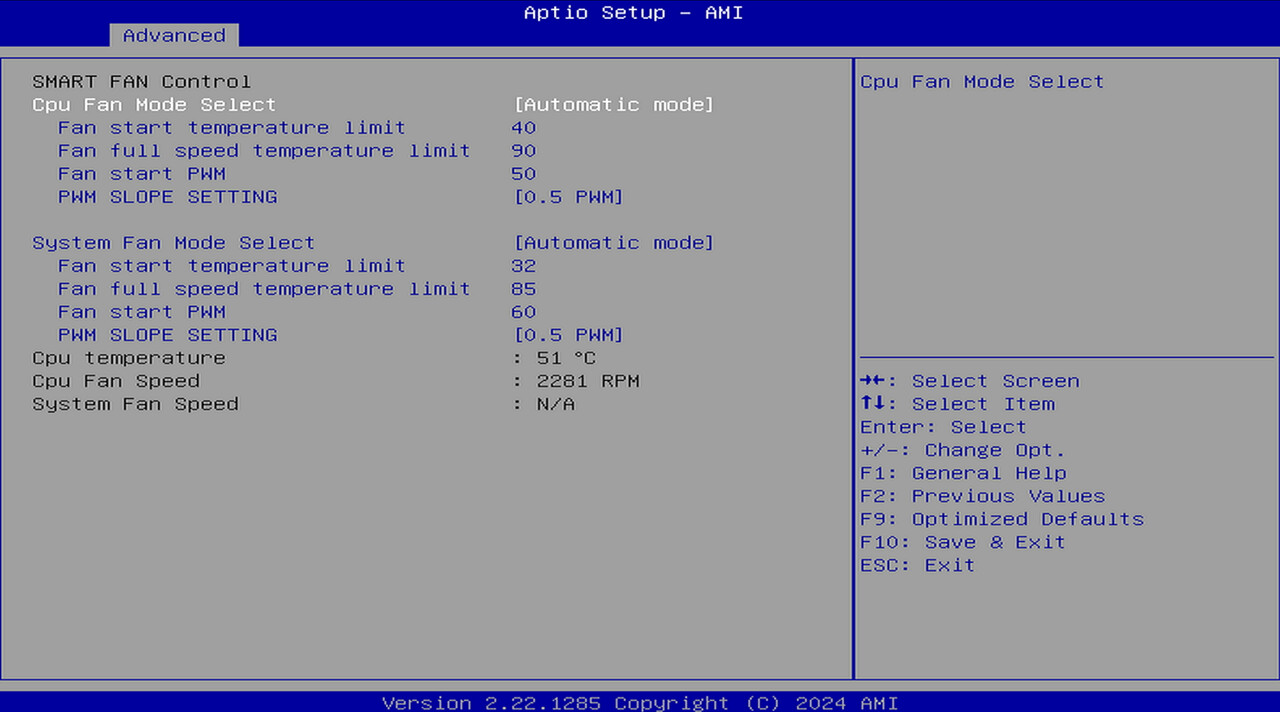
Then enter the intelligent fan control settings interface in ZimaCube BIOS. To optimize fan performance and ensure effective cooling of the system, it is recommended that you use the following recommended parameters:
-
Fan start temperature limit: 40°C
-
Fan full speed temperature limit: 90°C
-
Fan start PWM: 50
-
PWM Slope Setting: 0.5 PWM
-
*Tips: ZimaCube set to 1 PWM , ZimaCube Pro set to 0.5 PWM.
These parameters can help balance the noise and heat dissipation of the fan, ensuring that the ZimaCube can maintain stable operation under different loads.
- After completing the settings, press the F10 key to save and exit.