Imagine your home server running essential services like VPN, media transcoding, DNS, or even a game server. Have you ever thought about migrating these services to a new machine one day? Migrating services between different machines is a common need, and it would be even better if you could automatically migrate services to a new device in case of a server failure. How can we achieve this with ZimaBlade?

ZimaBlade is a compact yet powerful server computer. PVE (Proxmox Virtual Environment) is a server virtualization management solution. You can use ZimaBlade with PVE to manage virtual machines, containers, and highly available clusters.

Today, we’ll set up our PVE Cluster using 2 ZimaBlade units to achieve service migration.
Here’s what you need:
- 2 ZimaBlade Kits: ZimaBlade Single Board Server
- 2 Hard Drives (SATA)
- Additionally:
- 1 USB Drive for creating the PVE installation media
- 1 USB Hub so you can connect both your keyboard and USB drive to the ZimaBlade
- 2 RJ45 cables with LAN connections for networking
- 1 Keyboard and Monitor for initial setup
Installing the PVE System
Here are the simple steps to install PVE on ZimaBlade:
Using Rufus, write the PVE ISO file to a USB drive. You might need these resources:
Get Rufus: Rufus Download
Get PVE ISO: Proxmox Download
Write PVE to the USB drive to create the PVE installation media:
- Insert the USB drive into a Windows host and launch the Rufus program on that host.
- In Rufus, under “Device”, select the USB drive you just inserted.
- Under “Boot selection”, click the SELECT button to choose the PVE ISO file from your disk.
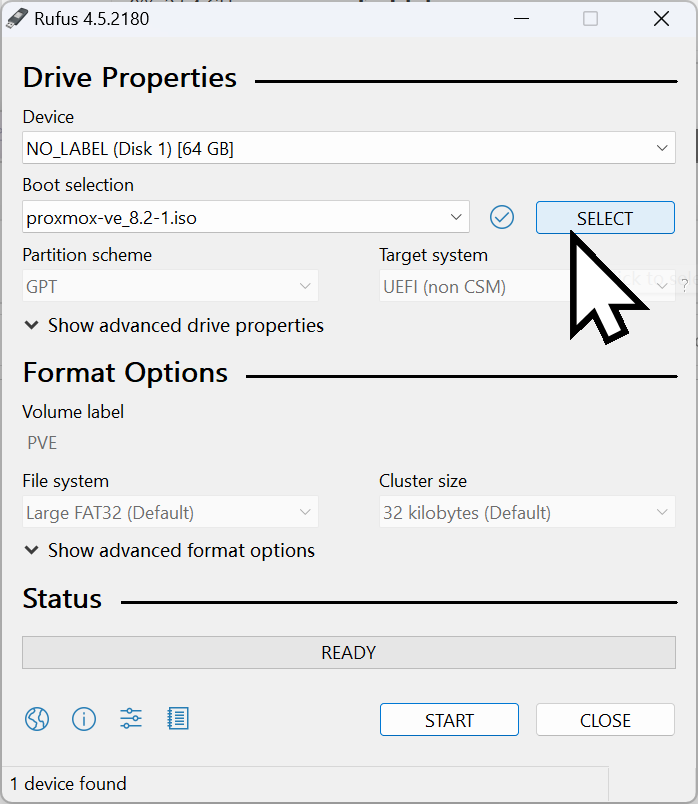
- Click START button to write the installation file to your USB drive.
Install memory, connect the Ethernet, and video cables to ZimaBlade. For a detailed step-by-step guide on installing memory and other components on ZimaBlade, refer to this comprehensive tutorial: Set up a NAS with ZimaBlade.
Now, let’s install PVE:
- Safely remove the USB drive from the Windows machine and plug it, along with the keyboard, into the USB Hub.
- Connect the USB Hub to ZimaBlade.
- Power on the monitor.
- Connect the power supply to ZimaBlade, then quickly and repeatedly press the DEL key on the keyboard to enter the ZimaBlade BIOS.

- Use the arrow keys on the keyboard to navigate through the BIOS, and find the “Save & Exit” menu.
- Under “Boot Override”, locate your USB drive and press Enter.
- You will now enter the PVE installation UI.
When installing PVE on the 2 ZimaBlade units, keep these points in mind:
- Install PVE on external storage (not on the internal eMMC).
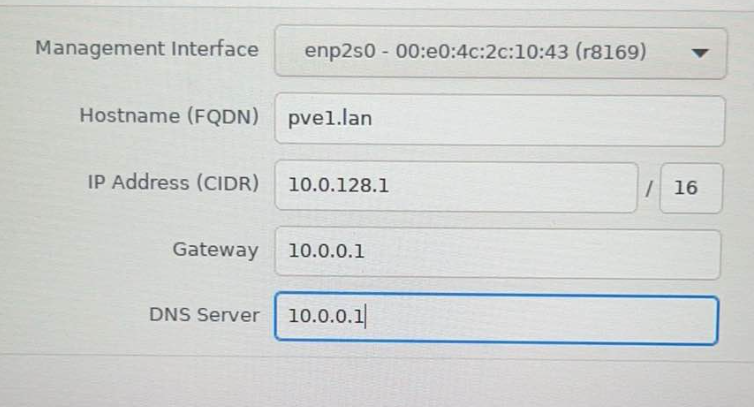
- Ensure they have consistent locale settings. Here’s an example:

- Use different hostnames for each ZimaBlade.
- Manually assign different IP addresses to each ZimaBlade (depending on your LAN configuration). Here’s an example:
Follow the prompts and wait for the installation to complete.
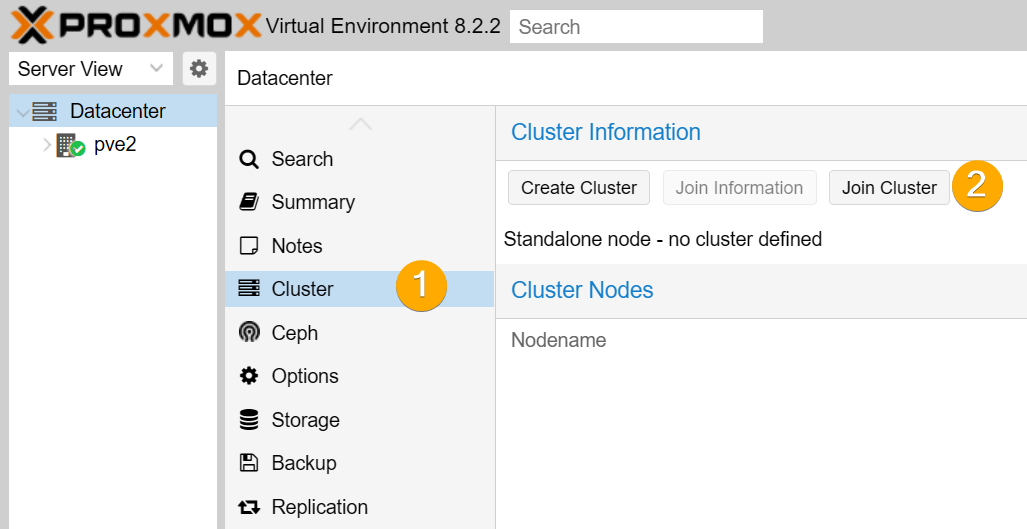
Create PVE Cluster
Choose any one of your ZimaBlade units and access the PVE WebUI at https://PVE1IP:8006:

Click on “Cluster”, then “Create Cluster”. Give your cluster a name, then click “Create”:

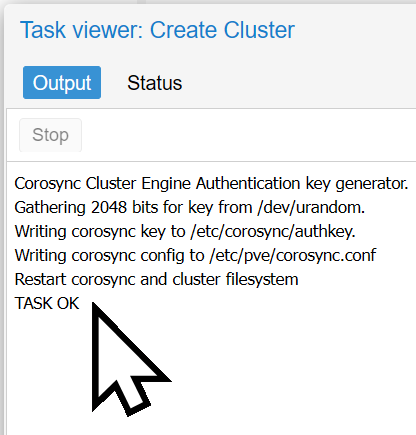
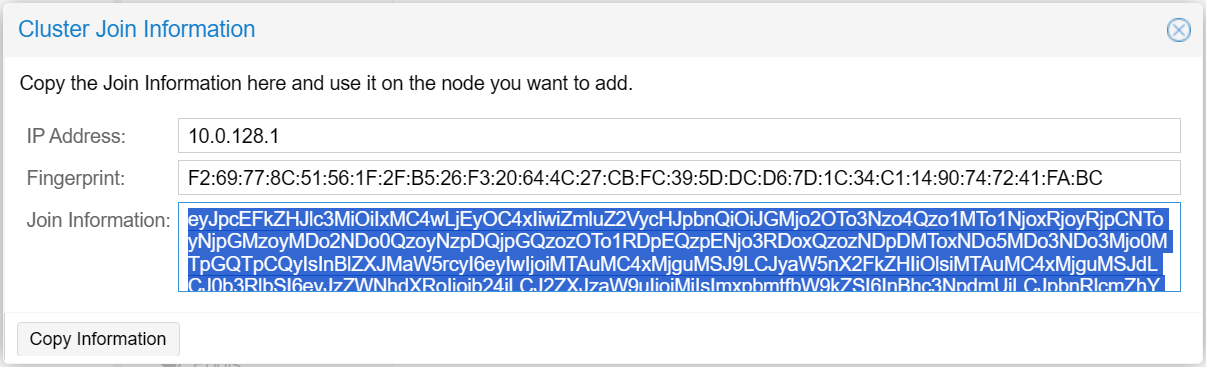
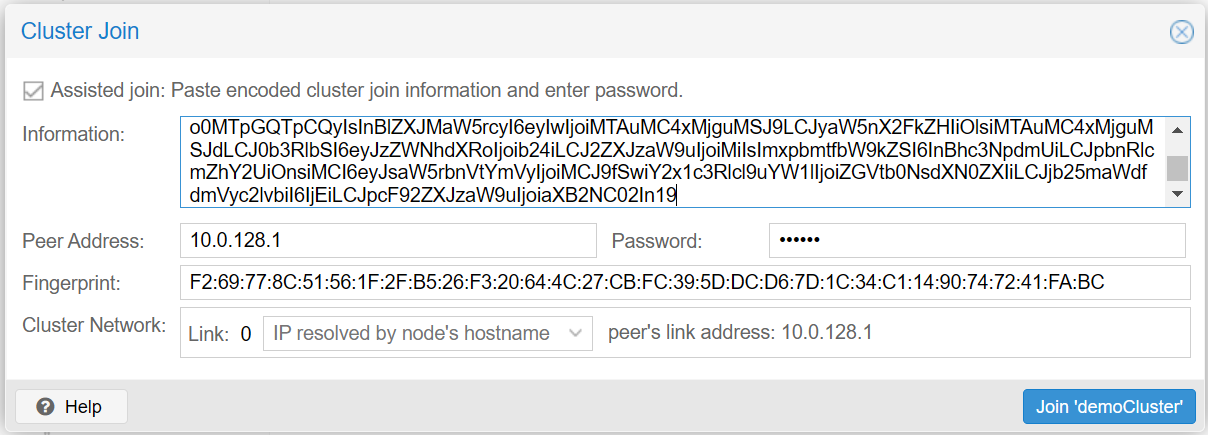
After you see “TASK OK”, close the window, click on “Join Information”, and then click “Copy Information”:
Next, access the PVE WebUI on the second ZimaBlade at https://PVE2IP:8006:
Click on “Cluster”, then “Join Cluster”, paste the join information you copied earlier, enter the root password of the other ZimaBlade, and click “Join **Cluster”:
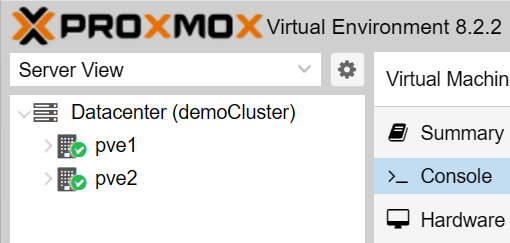
Now, this machine is part of the Cluster. If you have more machines, the steps are the same. Once multiple nodes are joined to the Cluster, logging into the PVE WebUI on any ZimaBlade will show the presence of other nodes.
Now, you can install virtual machines and services on any node!
Cluster Use Case: Service Migration
To migrate a service running on one node to another node in the Cluster:
- Choose one node to install the system. Here, I will use Debian as an example.
- For a detailed video tutorial on installing a system in PVE, check out our video: How to Install a System in PVE
- Once installed, click the “Start” button on the right to start the virtual machine.
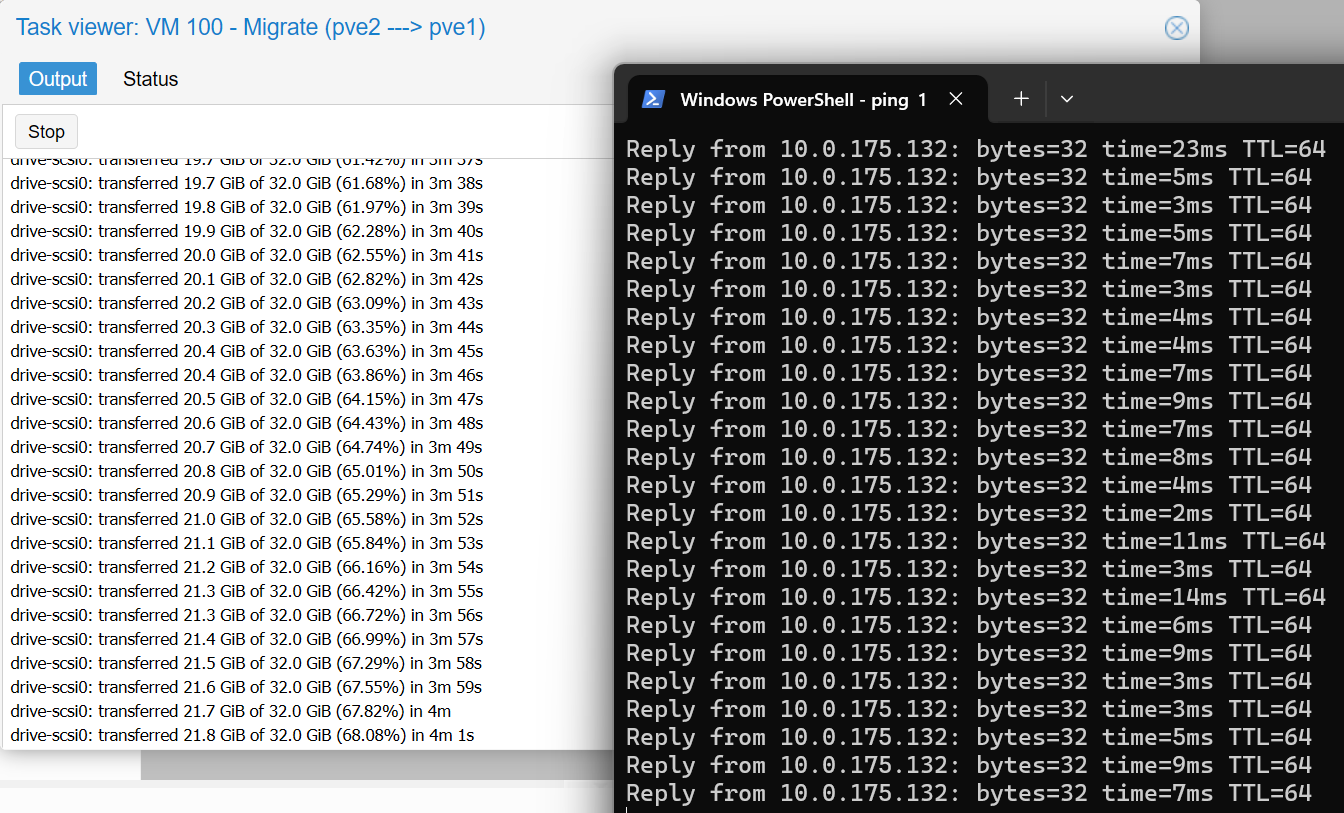
- From another Windows machine on the same LAN, ping this virtual machine.
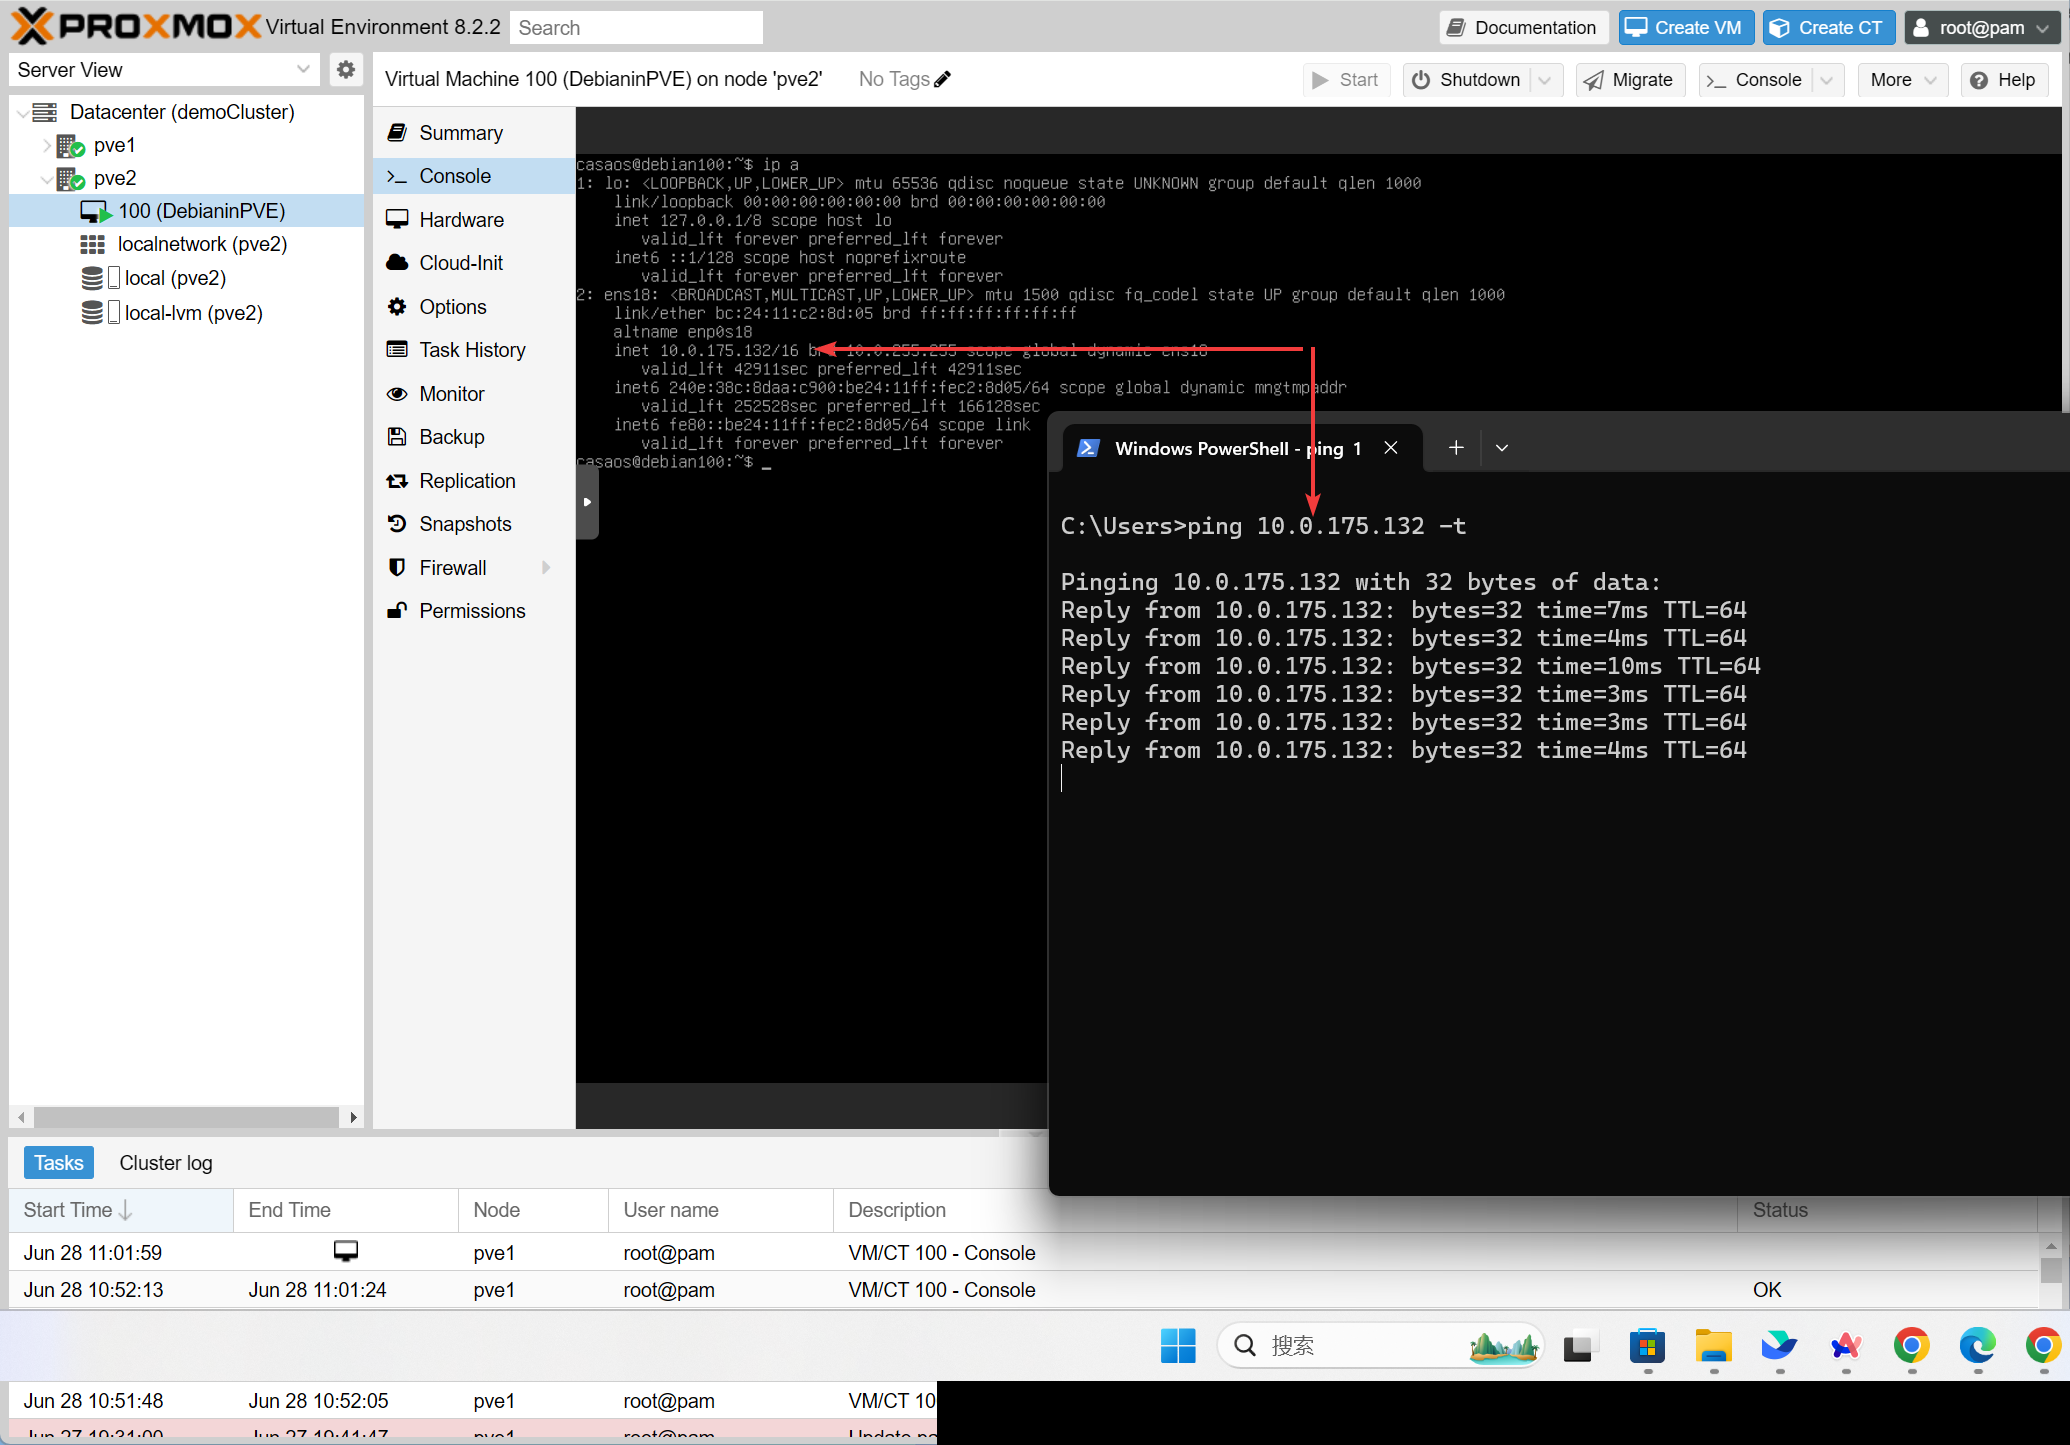
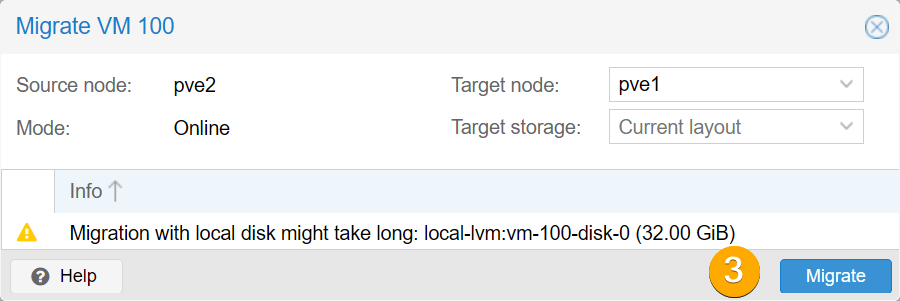
- Now, I will migrate the virtual machine from PVE2 to PVE1. Follow the steps to complete the service migration.

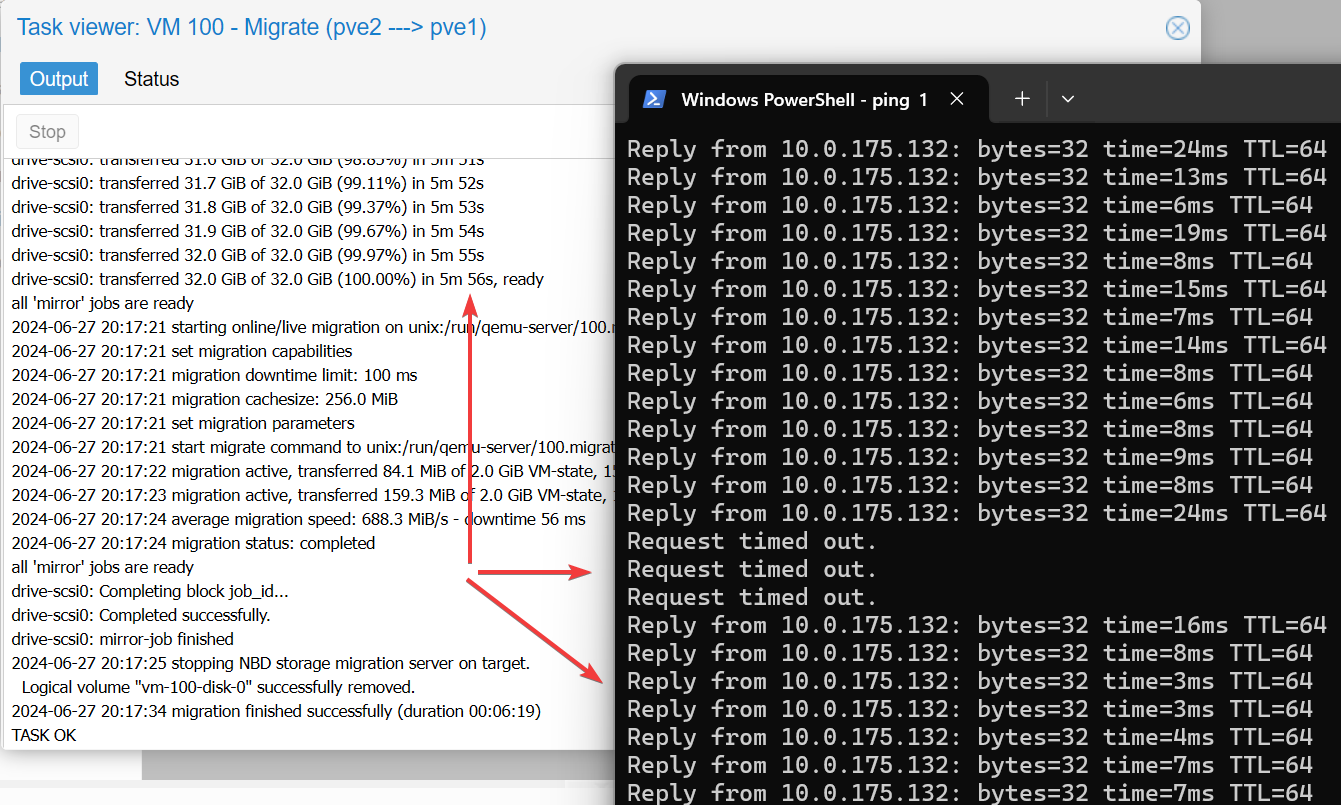
- During the migration process, the original service will keep on running.

- After a brief interruption, the service migration is complete, and the ping will resume.
- Done! You have successfully migrated your virtual machine.
Other Resources
Service migration is just the beginning. With Ceph, you can automatically migrate services to other nodes in the Cluster when one node fails! In future articles, we will show you the complete setup process for ZimaBlade + Cluster + Ceph + HA.
If you encounter any issues during use, feel free to let us know at any time. Just comment below. We look forward to your feedback!
Original article published at here.