Not sure how to make Immich use the attached NAS for photo storage instead of main drive. There are other posts about this that do not have a real solution.
This might be helpful:
1 Like
Yes, this is helpful. But the issue remains that Immich documentation for Zima OS seems incorrect and needs to be updated. Following it now causes Immich to break.
You need to copy all the working content of Immich “Upload” (usually located in “Gallery/Immich”) folder to a new drive/folder and then put the new path in server settings.
It took a fair effort for me to get this working correctly but I finally managed it myself. There’s several changes needed to the original “Volumes” entries, but some entries must not be altered otherwise Immich fails.
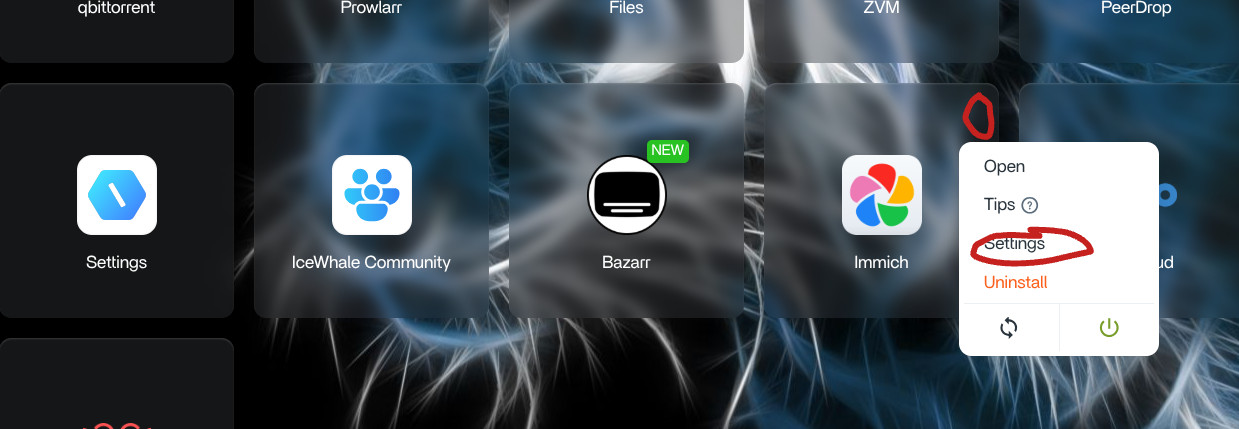
When installing Immich, make sure to select “Custom Install” or if it’s already installed, click the 3 dots, then “Settings”.
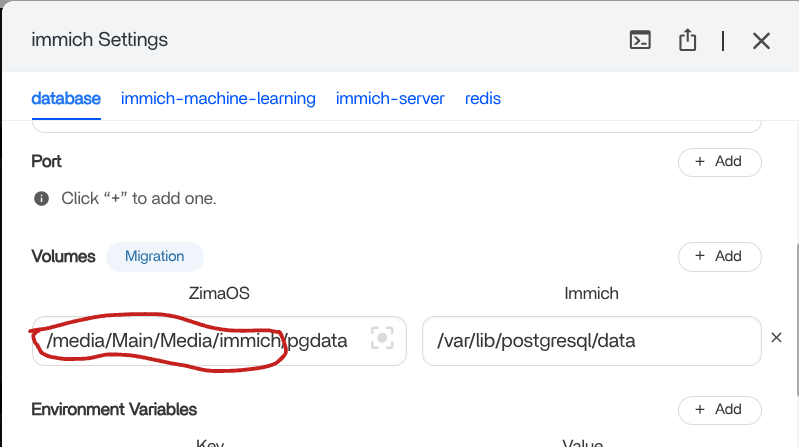
There’s 4 “tabs” along the top of the settings page. The first one is “database” and here you change the ZimaOS “volume” to where you wish Immich to be. In my case it’s /media/Main/Media/immich/ so change this to your destination but leave the ending as /pgdata but do not touch the volume on the right “Immich” side.
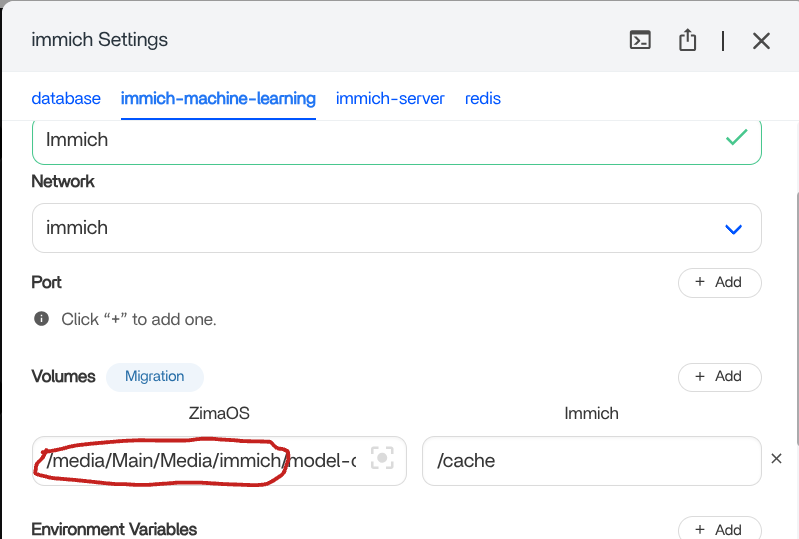
The next tab along the top is immich-machine-learning and here again change everything before /model-cache to your desired directory. Leave the volume entry for Immich alone again.
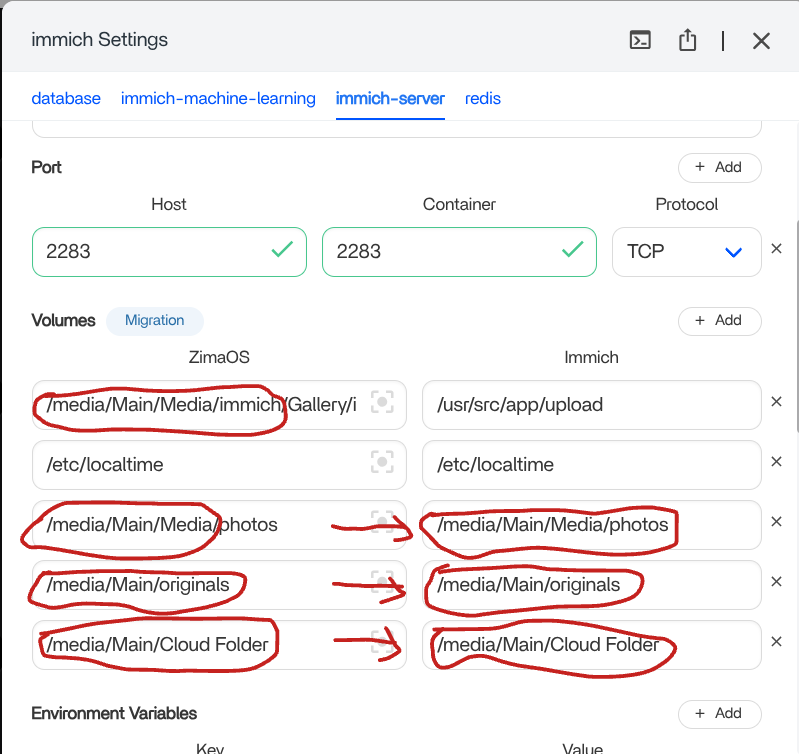
The third tab, immich-server is where I kept tripping up. You have to change SOME of the Immich volume entries to be the same as the ZimaOS volume entries. Follow the screenshot below and you can see the arrows where you need to make the changes.
The fourth tab, redis, does not have any changes so leave the entries alone here. Hopefully this works and helps out anyone else!
3 Likes