1.5.3
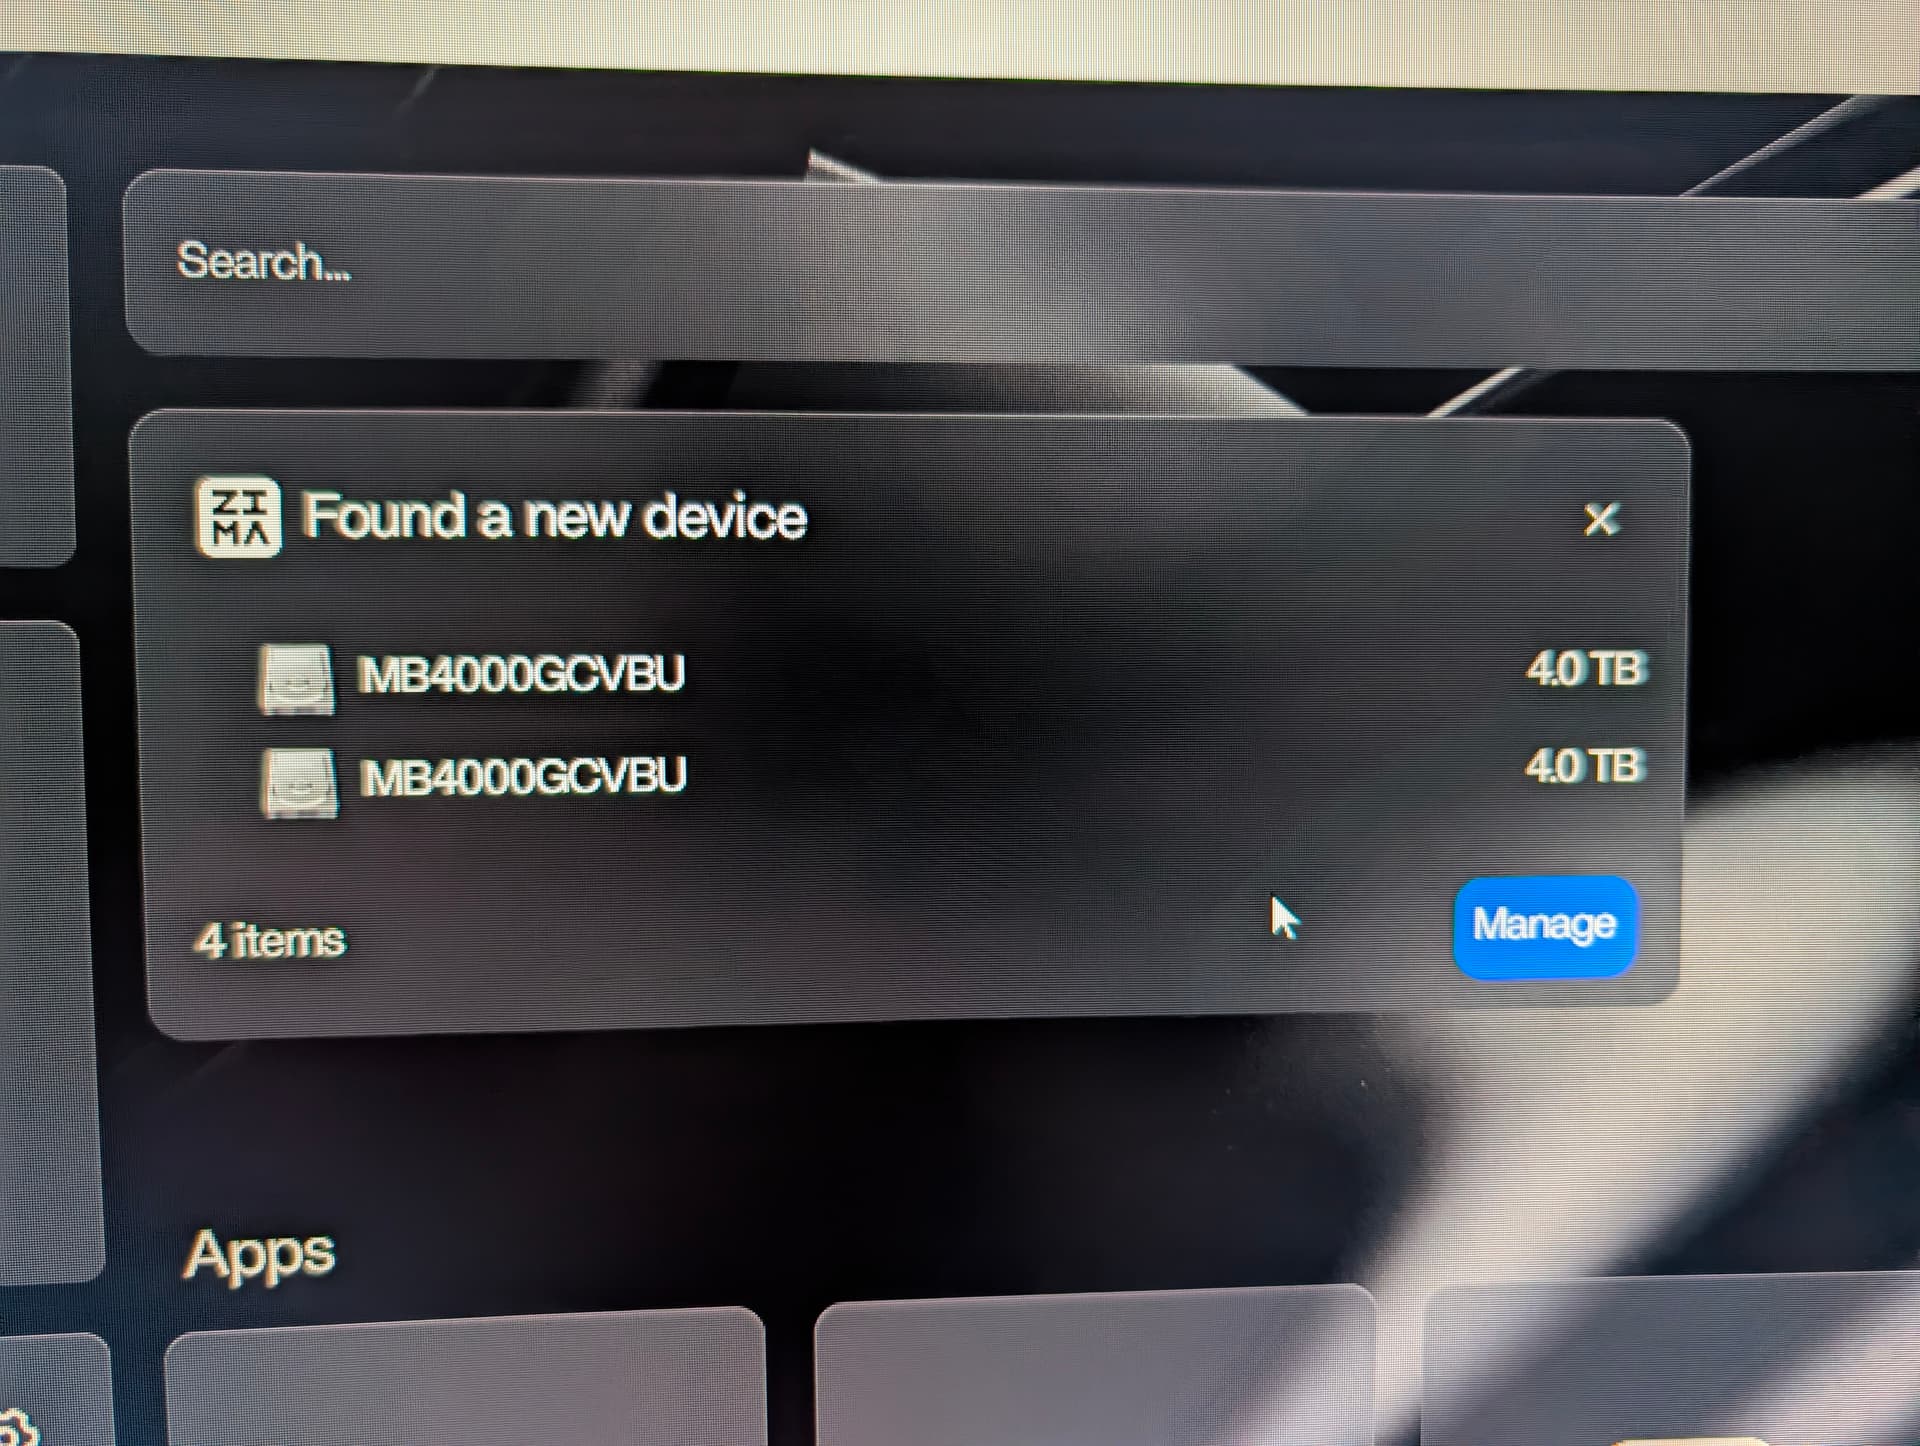
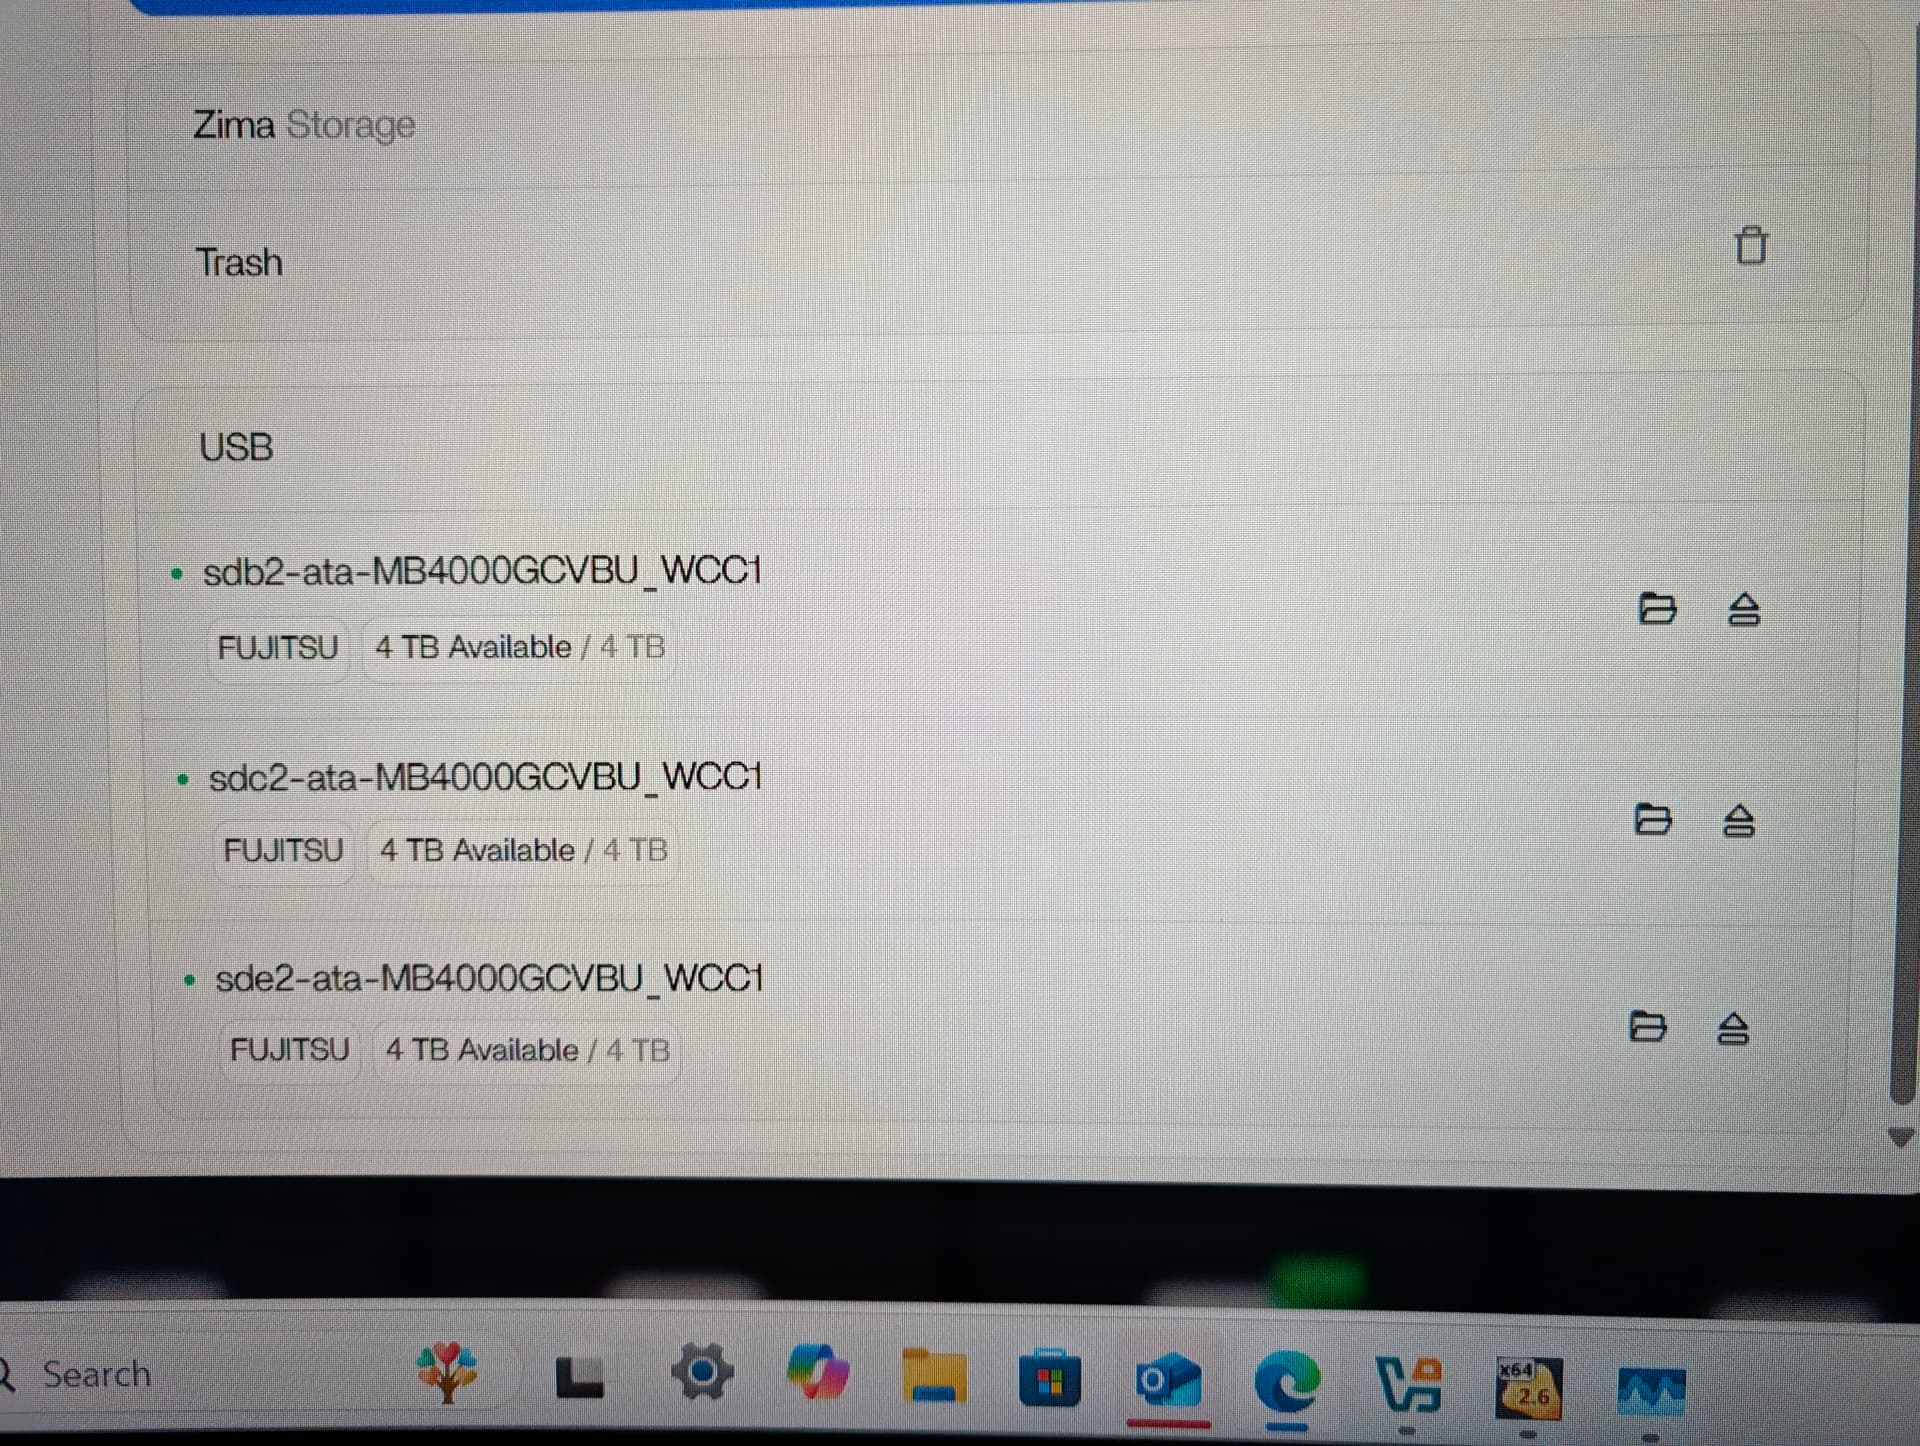
Using a Terramaster d4-320. It’s only letting me see 3 of the 4 drives.
I also still can’t create a RAID 5 cluster either (future update I hope).
Can you see all of them under lsblk?
I think the behaviour you are seeing comes down to how the Terramaster D4-320 presents its disks to the host. I suggest checking this first because these enclosures often use a USB SATA bridge that does not expose all four drives independently. Many only pass through three LUNs even when four disks are installed.
I believe this is why ZimaOS is correctly detecting three disks and the fourth never appears at the block-device level. When the enclosure does not export all disks as separate addresses, ZimaOS cannot see them and cannot build RAID 5, since RAID requires full low-level access to every drive.
I suggest confirming in Terramaster’s documentation whether the D4-320 supports full JBOD passthrough over USB. If the unit is operating in a semi-hardware-managed mode, the host only receives the virtualised drives it exposes.
If the goal is true RAID 5 handled by ZimaOS, the enclosure must support transparent JBOD mode where all disks appear as sda, sdb, sdc, sdd. If the enclosure cannot provide that, ZimaOS will only work with whatever disks it receives from the bridge chip.
This is not a ZimaOS limitation. It is a characteristic of many USB DAS units. If the D4-320 does offer full passthrough, then I think a firmware update or a different USB mode on the enclosure may resolve it.
At least you see 3 out of 4 disks. I see none of my four 6 TB hd’s, even tough they appear with “fidsk -l” from within ZimaOS bash shell:
Disk /dev/sdc: 5.46 TiB, 6001175126016 bytes, 11721045168 sectors
Disk model: TDAS
Units: sectors of 1 * 512 = 512 bytes
Sector size (logical/physical): 512 bytes / 4096 bytes
I/O size (minimum/optimal): 4096 bytes / 4096 bytes
Disklabel type: gpt
Disk identifier: 9FB9221B-999C-4BFD-945C-3CF7DA7D4605

Device     Start         End     Sectors  Size Type
/dev/sdc1   2048 11721043967 11721041920  5.5T Linux filesystem


Disk /dev/sdd: 5.46 TiB, 6001175126016 bytes, 11721045168 sectors
Disk model: TDAS
Units: sectors of 1 * 512 = 512 bytes
Sector size (logical/physical): 512 bytes / 4096 bytes
I/O size (minimum/optimal): 4096 bytes / 4096 bytes
Disklabel type: gpt
Disk identifier: 83225610-0562-48E6-8632-5DA72E1DBDE3

Device     Start         End     Sectors  Size Type
/dev/sdd1   2048 11721043967 11721041920  5.5T Linux filesystem


Disk /dev/sde: 5.46 TiB, 6001175126016 bytes, 11721045168 sectors
Disk model: TDAS
Units: sectors of 1 * 512 = 512 bytes
Sector size (logical/physical): 512 bytes / 4096 bytes
I/O size (minimum/optimal): 4096 bytes / 4096 bytes
Disklabel type: gpt
Disk identifier: 27F276EE-3734-44DA-8A7C-EEB6F99BE90B

Device     Start         End     Sectors  Size Type
/dev/sde1   2048 11721043967 11721041920  5.5T Linux filesystem


Disk /dev/sdf: 5.46 TiB, 6001175126016 bytes, 11721045168 sectors
Disk model: TDAS
Units: sectors of 1 * 512 = 512 bytes
Sector size (logical/physical): 512 bytes / 4096 bytes
I/O size (minimum/optimal): 4096 bytes / 4096 bytes
Disklabel type: gpt
Disk identifier: A94852B0-7DAB-490D-A6BE-549FF36987FA

Device     Start         End     Sectors  Size Type
/dev/sdf1   2048 11721043967 11721041920  5.5T Linux filesystem
Something similar happened to the internal /dev/sdb1 SATA drive in my MiniPC. It was ZFS-formatted by TrueNAS (I was testing different OS’s) and it was impossible for 1.5.3 ZimaOS to get it formatted and enabled. Then I formatted it to btrfs (fdisk) from within the ZimaOS bash shell, but it was still impossible to enable it after that. Only when I reinstalled 1.5.3 ZimaOS I was able to enable it as my data drive. So, I formatted all of the four disks from within the ZimaOS bash shell (above console snippet), but they still get unrecognizable by the Storage app. I didn’t try reinstalling ZimaOS yet, though, because I’m trying to save myself the burden of starting from scratch again.
And yes, I can see and mount all of the four disks when I connect the D4-320 case to my Gentoo Linux box.
Nope, Terramaster D4-320 is not the culprit. Please, see why in my answer to the OP.
I am hit by the same issue.
Here you can see all of them appear with lsblk:
root@ZimaOS:/root ➜ # lsblk
NAME   MAJ:MIN RM   SIZE RO TYPE MOUNTPOINTS
loop0    7:0    0   4.8M  1 loop
loop1    7:1    0   208K  1 loop
loop2    7:2    0   1.1M  1 loop
loop3    7:3    0   4.8M  1 loop
loop4    7:4    0   1.1M  1 loop
loop5    7:5    0   208K  1 loop
loop6    7:6    0  17.8M  1 loop
loop7    7:7    0   4.8M  1 loop
loop8    7:8    0  10.7M  1 loop
loop9    7:9    0   5.2M  1 loop
loop10   7:10   0   1.1M  1 loop
loop11   7:11   0   208K  1 loop
sda      8:0    0 238.5G  0 disk
├─sda1   8:1    0    32M  0 part /mnt/boot
├─sda2   8:2    0    24M  0 part
├─sda3   8:3    0     6G  0 part /
├─sda4   8:4    0    24M  0 part
├─sda5   8:5    0     6G  0 part
├─sda6   8:6    0     8M  0 part
├─sda7   8:7    0    96M  0 part /var/lib/rauc
│                                /var/lib/zerotier-one
│                                /mnt/overlay
└─sda8   8:8    0 226.3G  0 part /var/lib/libvirt
                                 /var/lib/icewhale
                                 /var/log
                                 /var/lib/extensions
                                 /var/lib/bluetooth
                                 /opt
                                 /var/lib/docker
                                 /var/lib/casaos
                                 /DATA
                                 /media
                                 /var/lib/casaos_data
sdb      8:16   0 931.5G  0 disk
└─sdb1   8:17   0 931.5G  0 part /DATA/.media/sdb1
                                 /var/lib/casaos_data/.media/sdb1
                                 /media/sdb1
sdc      8:32   0   5.5T  0 disk
└─sdc1   8:33   0   5.5T  0 part
sdd      8:48   0   5.5T  0 disk
└─sdd1   8:49   0   5.5T  0 part
sde      8:64   0   5.5T  0 disk
└─sde1   8:65   0   5.5T  0 part
sdf      8:80   0   5.5T  0 disk
└─sdf1   8:81   0   5.5T  0 part
nbd0    43:0    0     0B  0 disk
nbd1    43:32   0     0B  0 disk
nbd2    43:64   0     0B  0 disk
nbd3    43:96   0     0B  0 disk
nbd4    43:128  0     0B  0 disk
nbd5    43:160  0     0B  0 disk
nbd6    43:192  0     0B  0 disk
nbd7    43:224  0     0B  0 disk
zram0  252:0    0     0B  0 disk
zram1  252:1    0     0B  0 disk
zram2  252:2    0     0B  0 disk
nbd8    43:256  0     0B  0 disk
nbd9    43:288  0     0B  0 disk
nbd10   43:320  0     0B  0 disk
nbd11   43:352  0     0B  0 disk
nbd12   43:384  0     0B  0 disk
nbd13   43:416  0     0B  0 disk
nbd14   43:448  0     0B  0 disk
nbd15   43:480  0     0B  0 disk
We are currently purchasing the relevant DAS equipment to reproduce the problem. Our engineers will provide an update later. Thanks a lot.
Earlier I suggested the D4-320 might only be passing through three disks, because many USB DAS units behave that way.
But after seeing your new output, where all four 5.5 TB disks clearly appear at the block-device level (lsblk, fdisk -l), it’s now obvious that the enclosure is presenting all drives correctly to the kernel.
So the D4-320 is not the issue.
The real problem is different:
ZimaOS is ignoring the drives because their partition tables and filesystems were created manually.
Even though the kernel sees them, the ZimaOS Storage backend refuses to adopt any disk that was not initialised by ZimaOS itself.
Your disks currently have:
- manually-created GPT tables
- generic “Linux filesystem” partitions
- no ZimaOS metadata
- no internal registration under
/var/lib/casaos_data/.media/
And ZimaOS will simply not touch them.
This matches your own test on the internal SATA drive:
You manually formatted it, but it remained unusable until you reinstalled ZimaOS — because only the installer/Storage UI writes the metadata ZimaOS expects.
Why ZimaOS hides the disks from the Storage UI
ZimaOS only exposes a disk if:
- It is raw/uninitialised, or
- It was initialised by ZimaOS and contains its storage metadata.
Your four HDDs do not meet either requirement, so the UI treats them as “foreign” and hides them.
This is exactly why they mount fine on Gentoo, but ZimaOS pretends they do not exist.
So to correct the record:
- The enclosure is passing all 4 drives correctly.
- ZimaOS is intentionally ignoring them because they were partitioned/formatted manually.
- This is design behaviour, not a device problem.
Next steps
If you want these disks to appear in the Storage app, you will need to:
- Wipe the partition tables so they are completely blank (no GPT, no partitions).
- Reconnect them.
- Let ZimaOS show the “Initialize Data Disk” option for each one.
1 Like
Thanks a lot for your kind help. I will try that when I get home.
1 Like
Well. What I did:
- I wiped the disks (wipefs -a /dev/sdX) from within ZimaOS shell.
- Unplugged the case and plugged it in again.
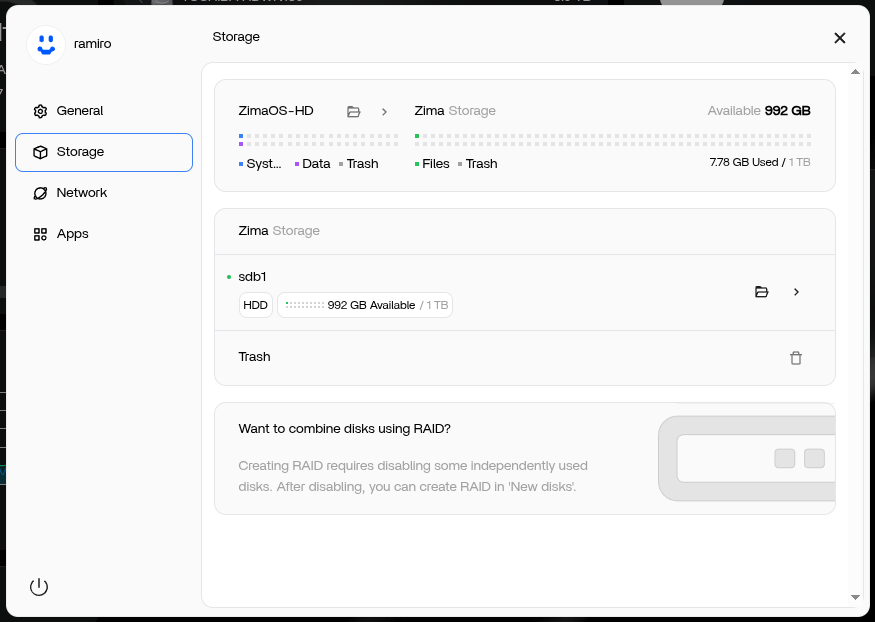
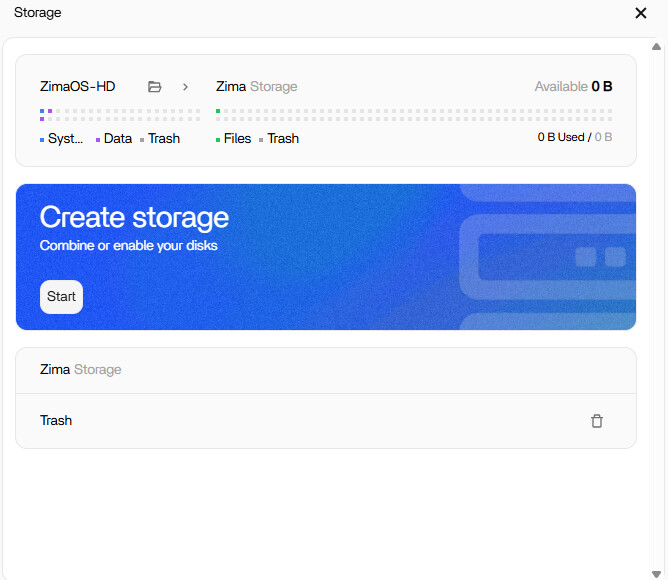
Disks NOT available to ZimaOS.
- I then rebooted from ZimaOS shell (reboot now). The lights on the DAS case flashed sometimes during booting in a different manner than before.
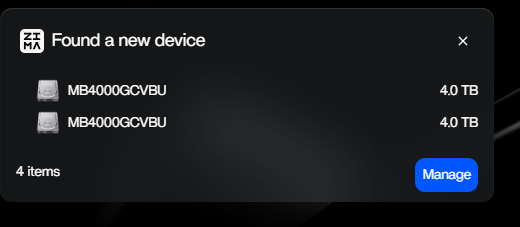
- But, ZimaOS still refuses to show them as available even though “lsblk” and “fdisk -l” show them. I attach two screenshots.
Maybe “wipefs -a /dev/sdX” is not the best way to wipe them? Which command can I run from within ZimaOS to achieve it?
You’re right to question whether wipefs -a is enough, it isn’t.
But before wiping anything, we must not assume which disk your ZimaOS system is running on. Device names (/dev/sda, /dev/sdb, etc.) can shift depending on boot order and USB timing. Wiping the wrong disk would destroy the OS.
So here’s the safe way to do it.
Step 1 - Identify the four HDDs safely
Run:
lsblk -o NAME,SIZE,MODEL
This shows:
- the device name (
sdX) - the size (your HDDs are ~6 TB)
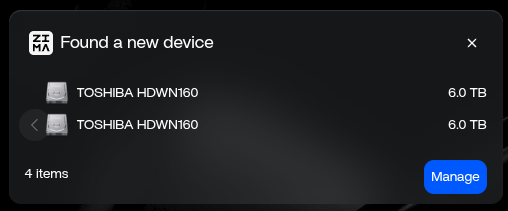
- the model (TOSHIBA HDWN… in your screenshot)
This step ensures you only wipe the 6 TB disks and nothing else.
Step 2 - Zap each selected disk properly
Once you have confirmed the correct device names from lsblk, wipe only those using:
sgdisk --zap-all /dev/sdX
wipefs -a /dev/sdX
This combination removes:
- all GPT/MBR partition tables
- the backup GPT at the end of the drive
- all filesystem signatures
ZimaOS will only recognise a disk as “new” when both the partition table and signatures are gone.
Why this works (and wipefs didn’t)
wipefs -a removes filesystem markers but leaves the GPT structure intact.
ZimaOS sees that GPT and assumes the disk is not raw > hides it.
sgdisk --zap-all is the missing step.
Step 3 - Reconnect or reboot
After wiping all four confirmed HDDs:
- unplug and reconnect the enclosure, or
- reboot ZimaOS
The Storage UI should now list them as initialisable disks.
If you’d like
I can help you read your lsblk output and tell you exactly which disks are safe to wipe before you run anything. Just paste the output here.
That avoids any risk to the system drive.
Followed these steps. I had to use the following command for wipefs
Blockquote wipefs -af /dev/sdX
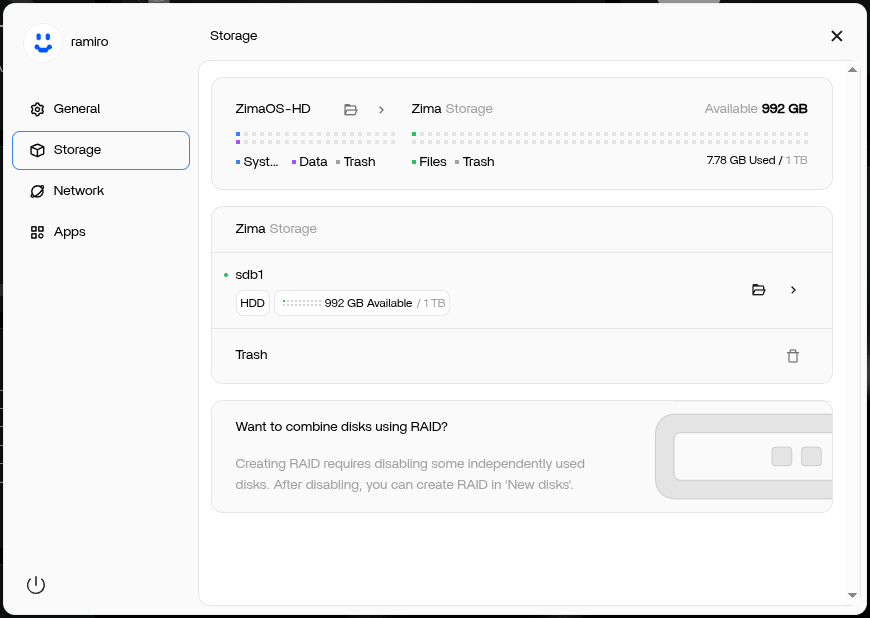
Even following these steps, rebooting and letting ZimaOS “rebuild” my dashboard, I still can not create a RAID. But worse now, I can’t see the drives in the Files app nor do they show under the Storage section in settings.
I followed your steps to the letter, unplugged & plugged again the case, to no avail.
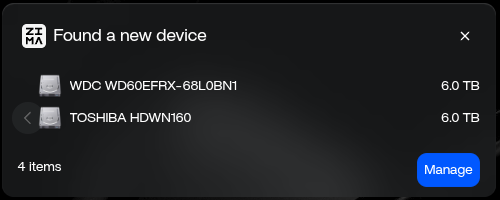
I then rebooted, again to no avail: ZimaOS keeps refusing to show the disks under Storage. Screenshots attached.
root@ZimaOS:/root ➜ # lsblk -o NAME,SIZE,MODEL
NAME     SIZE MODEL
.
.
.
sdc      5.5T TOSHIBA HDWN160
sdd      5.5T TOSHIBA HDWN160
sde      5.5T WDC WD60EFRX-68L0BN1
sdf      5.5T TOSHIBA HDWN160
At this stage I don’t think further shell commands will change anything.
You already wiped the disks correctly, and ZimaOS still isn’t registering them in the Storage UI.
Spider has mentioned that the team is now purchasing the same DAS hardware to reproduce the issue. I believe the best next step is to wait for their engineer’s findings, because this looks like something on the system side rather than anything you can fix with extra commands.
Once the team tests with the same enclosure, they’ll be able to advise the proper solution.
I own the Terramaster D5-300C and is having the same behaviour…
After performing…
sgdisk --zap-all /dev/sdX
wipefs -a /dev/sdX
and Restart
Zima stops seeing the hdd on the UI storage…only LSBLK can see the hdd
Thank You guys
Thanks for your feedback. We used a Terramaster d4-320 and formatted 4 NTFS/exFAT hard drives on Windows. They all showed up on the Zima. Therefore, we would appreciate it if you could provide more information.
- The format of these 4 drives
- How were these 4 drives formatted?
- Run the following two commands in the command line, then find the file(/ZimaOS-HD/disk-info.log) in Files and send it to us.
sudo -i
LOG=/DATA/disk-info.log; : > $LOG; { echo "=== lsblk ==="; lsblk; echo; echo "=== lsblk -f ==="; lsblk -f; echo; echo "=== curl http://127.0.0.1/v2/local_storage/disk ==="; curl http://127.0.0.1/v2/local_storage/disk; echo; echo "=== curl http://127.0.0.1/v2/local_storage/storages ==="; curl http://127.0.0.1/v2/local_storage/storages; echo; echo "=== journalctl -xe -u devmon.service ==="; journalctl -xe -u devmon.service; echo; } >> $LOG 2>&1 && echo "The output has been saved to $LOG""
In addition, we will soon support the management of USB devices, including formatting, RAID creation, and more, so stay tuned.