This is for people that can’t find tools for their motherboards.
Thanks to Zima for the invitation — here’ s a simple method to write a UUID.
Quick Guide
Using the AMI DMIEdit (AMI DMI editing) tool, you can easily write a UUID to your device (and potentially other DMI fields as well).
There’s no need to worry about which “flash tool version” you need, because what we’re doing here is only a low-level DMI edit (writing/changing the motherboard UUID), essentially like modifying a string. This does NOT flash or overwrite your original BIOS/UEFI firmware. In theory, this should work with any AMI BIOS platform.
Step-by-step Instructions
1. Prepare a USB drive
-
Use a USB drive and format it as FAT32.
-
Extract the downloaded package, and copy all files directly to the root of the USB drive.
2. Boot from the USB drive
-
Insert the USB drive before powering on.
-
Power on the device and repeatedly press DEL or F11 to enter the BIOS/boot menu.
-
Choose to boot from the USB drive.
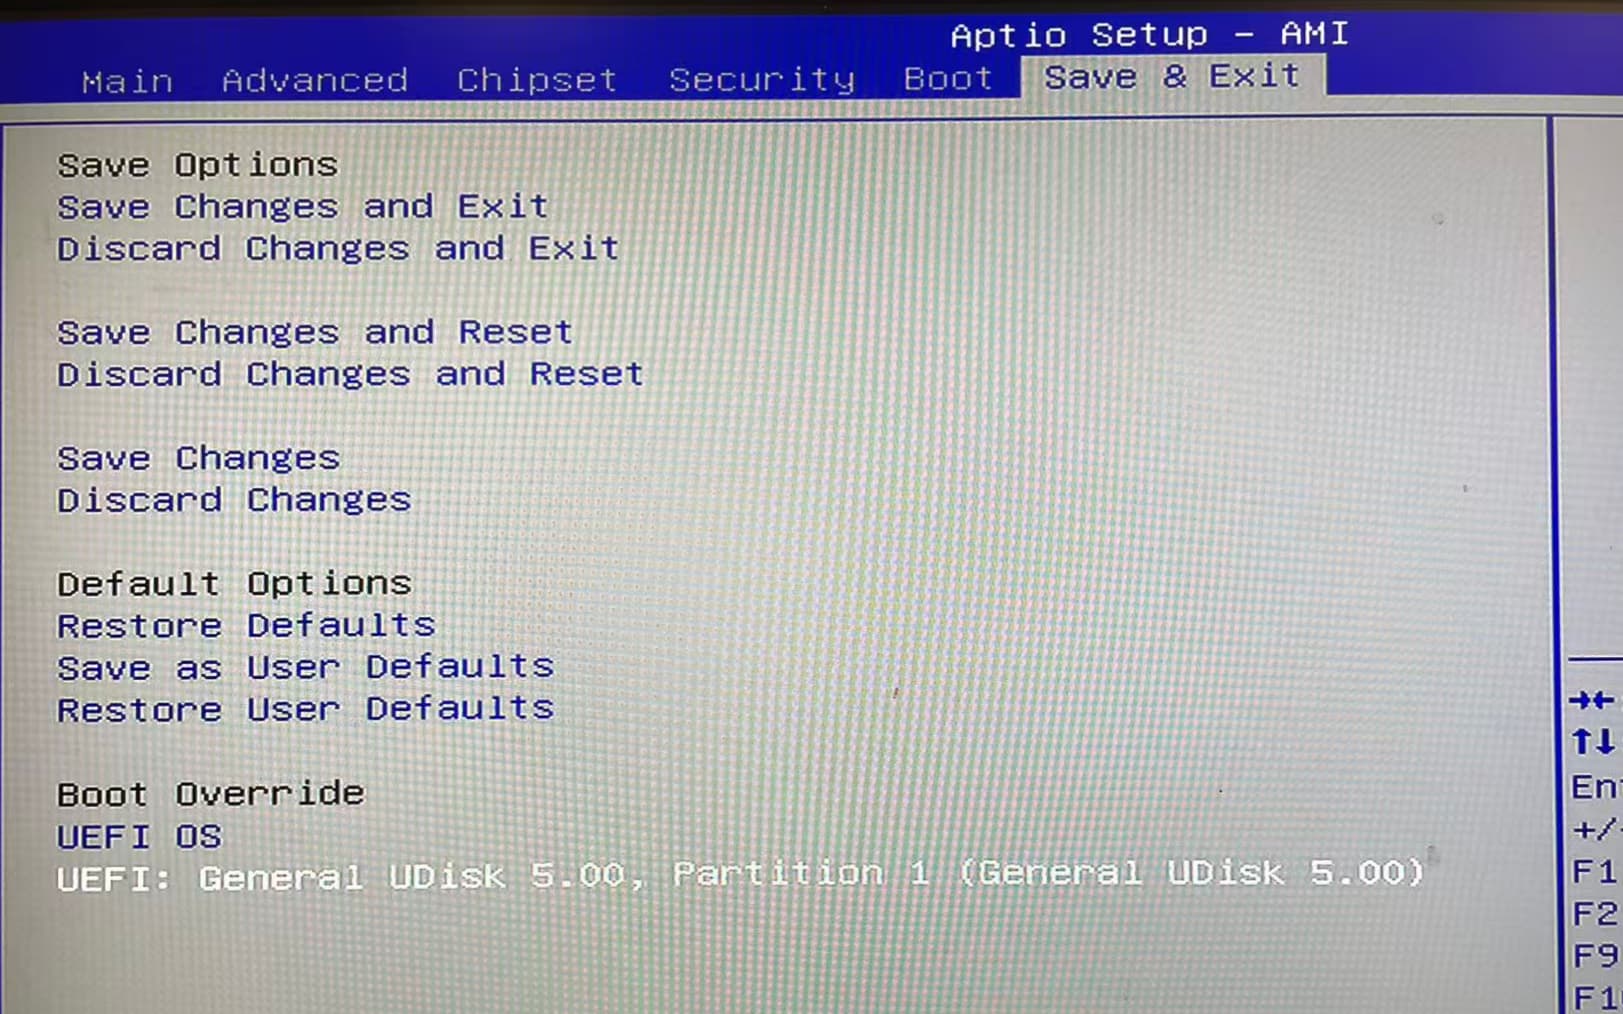
3. Enter the UEFI Shell
If you see a screen similar to a UEFI Shell interface, it means you’ve successfully booted into the shell environment.
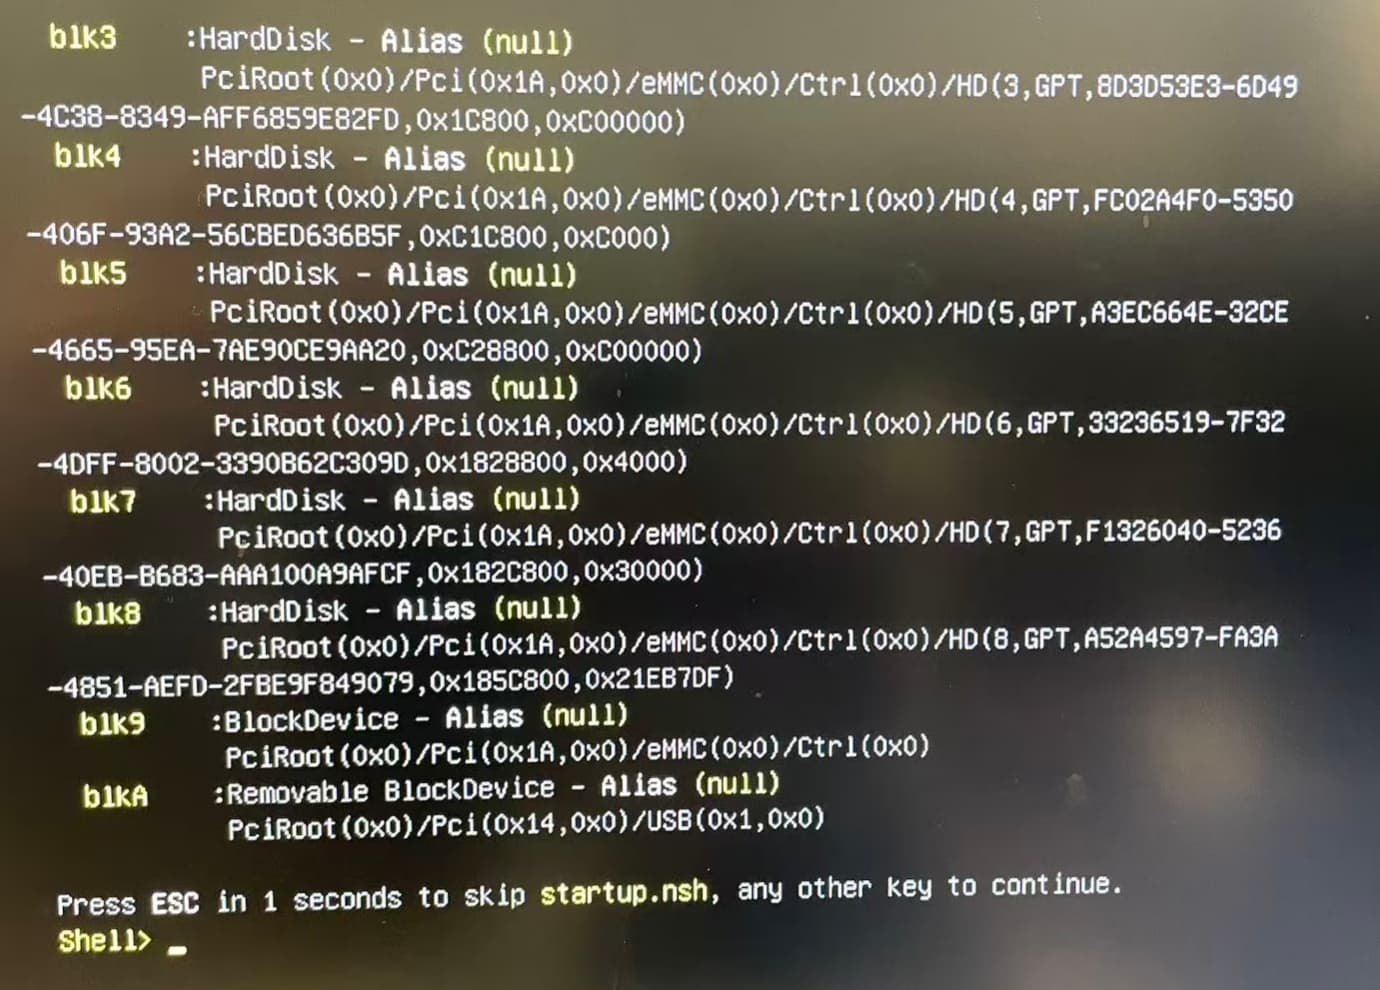
4. Locate the tool: AMIDEEFIx64.efi
Next, you need to find the DMI editing tool on the USB drive: AMIDEEFIx64.efi
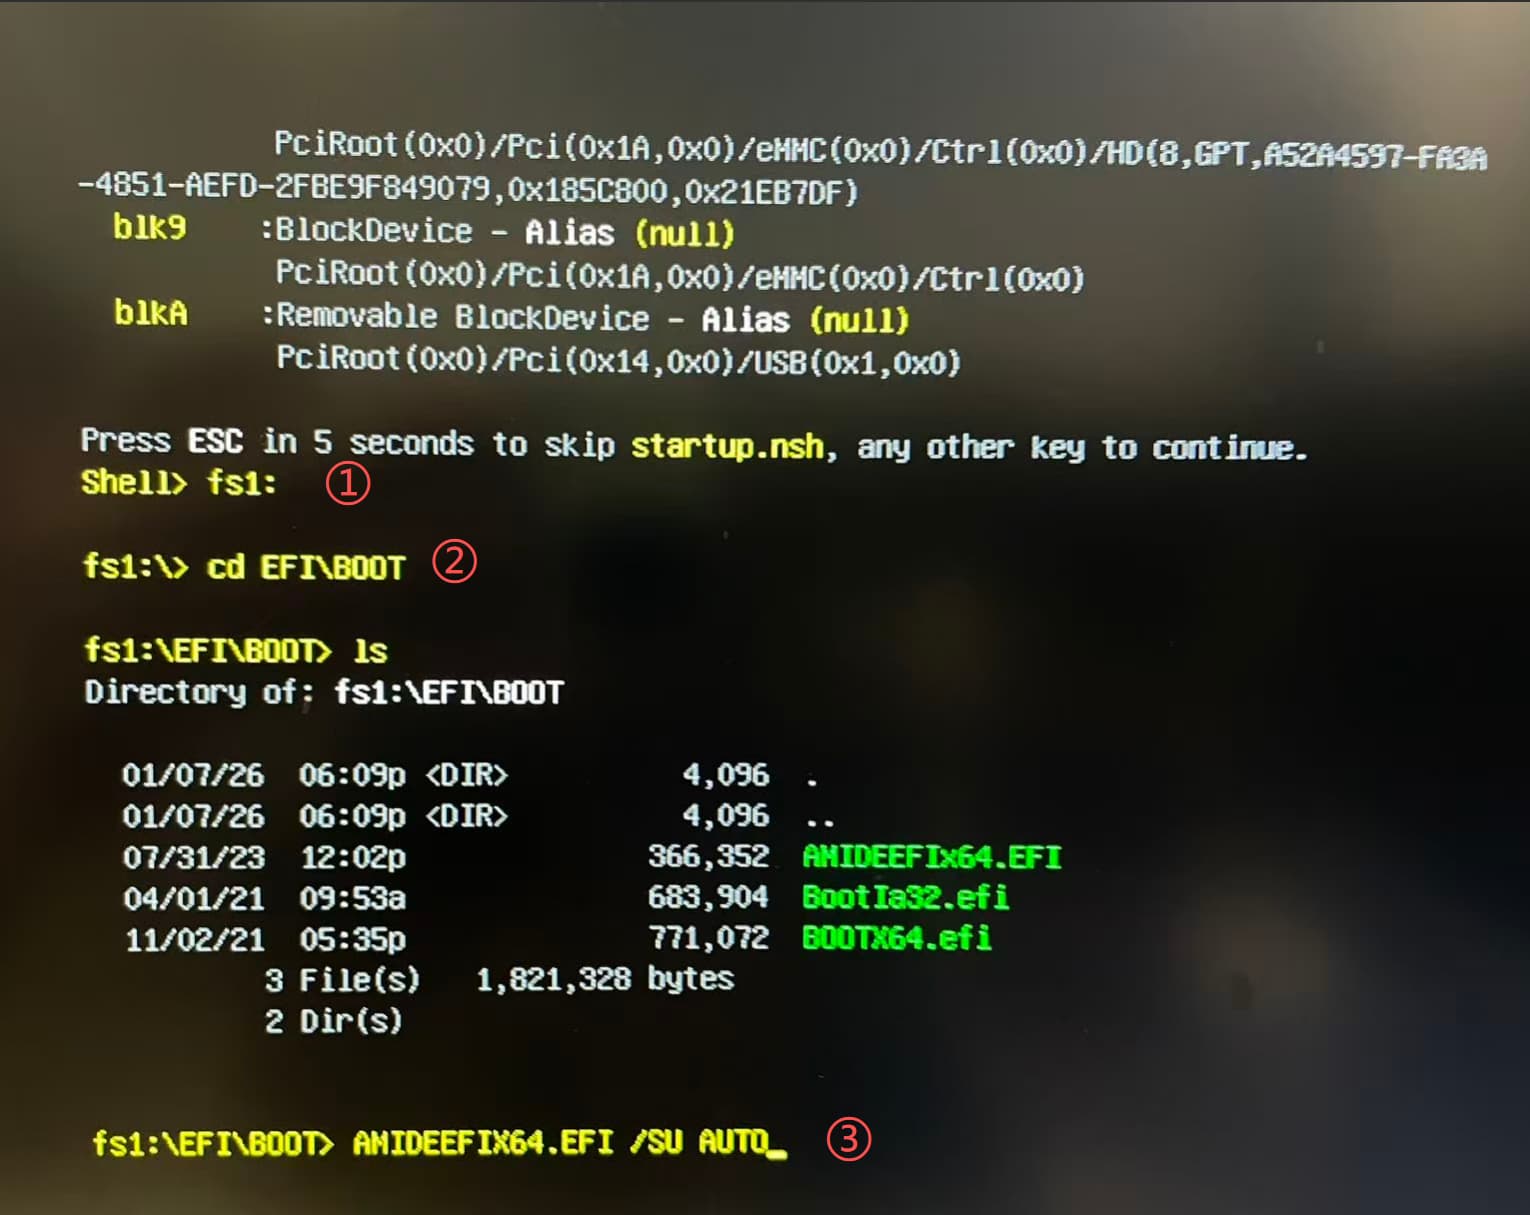
Find the USB drive mapping (fsX:)
In UEFI Shell, partitions are mapped as fs0:, fs1:, etc. Use these to switch between file systems (don’t forget the colon), for example:
fs1:
(For ZimaBoard, fs0: is often the eMMC (internal storage), not the USB drive.)
Useful UEFI Shell commands:
ls/dir— list directory contents
cd— change directory
exit— leave the UEFI Shell
Use fsX:, ls/dir, and cd to navigate until you find AMIDEEFIx64.efi.
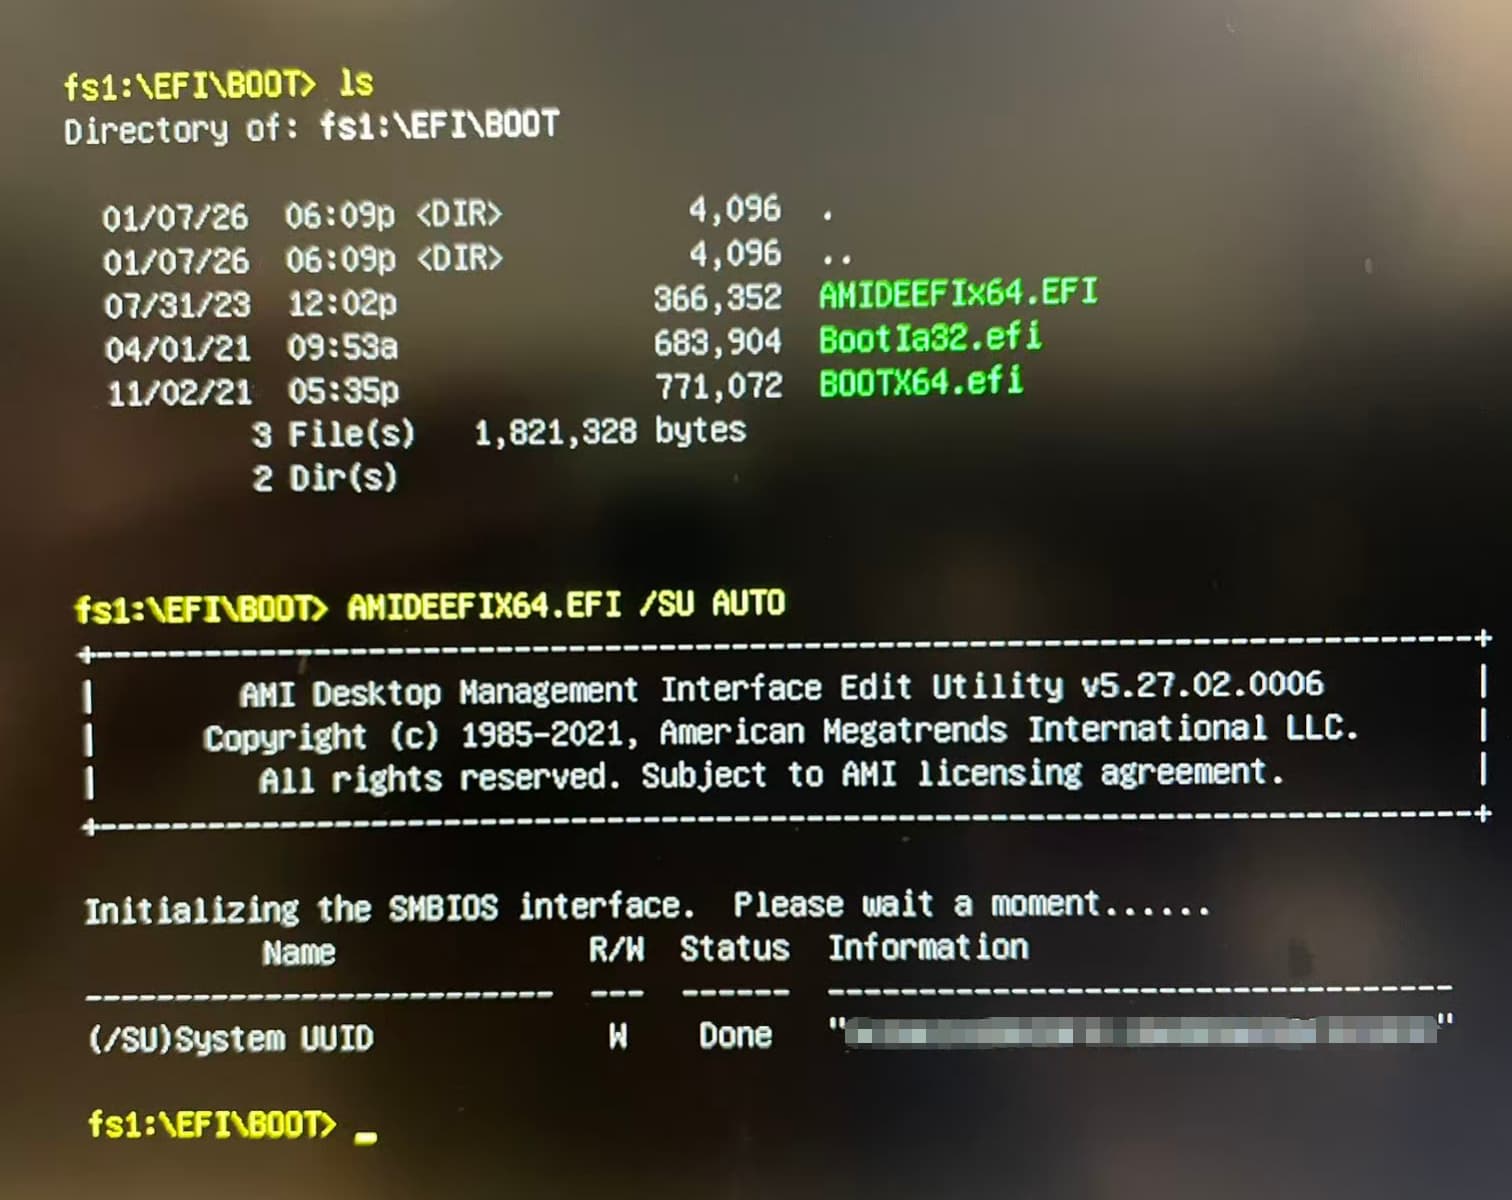
Run the UUID auto-write command
Once you’re in the correct directory, run:
AMIDEEFIx64.efi /SU AUTO
(AUTO means it will be generated automatically, or you can enter any number you want.)
5. Confirm the tool runs
Normally, you should see the tool start and run automatically.
6. Reboot
After it finishes, press Ctrl + Alt + Del to reboot. (You can remove the USB drive at this point.)
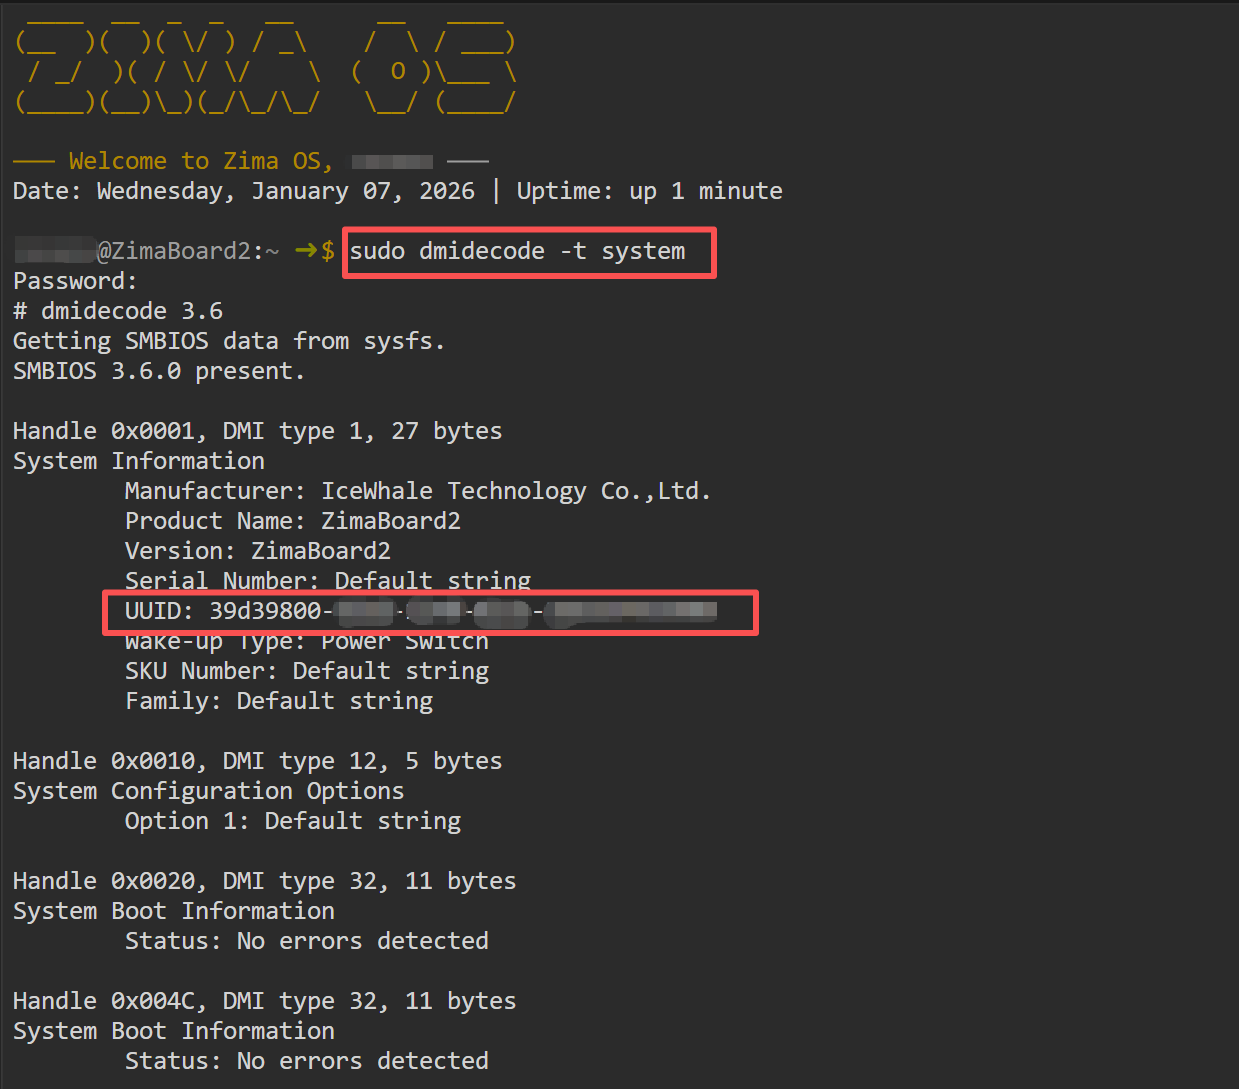
Done 
After booting into ZimaOS, you can verify the generated UUID with:
sudo dmidecode -t system
Good luck!