After upgrading to ZimaOS 1.6.0 or 1.6.1, some users may encounter the following issues:
-
Duplicate storage folders with a
_1suffix appearing in the directory structure -
Plex, Jellyfin, Docker, Backup, or ZVM unable to locate existing media libraries or files
-
Old storage names still appearing in SMB shares or the File Manager
-
The same disk or storage path appearing to be mounted multiple times
-
Other storage path or mount-related abnormalities
If you are experiencing any of the issues above, please follow the steps below to resolve them.
![]() Important
Important
Before making any changes, please verify which folder is currently active.
In most cases, the folder with the _1 suffix is the active mount point, while the original folder is only a leftover directory.
Do not manually delete any folders.
If you use RAID, Docker, Plex, Jellyfin, or have important data on the disk, please contact support before proceeding:![]() dina@icewhale.org
dina@icewhale.org
Step 1: Temporarily Rename the Original Mount Directory
Open the ZimaOS File Manager and locate both the original storage directory and the newly created directory with the _1 suffix.
For example, you may see:
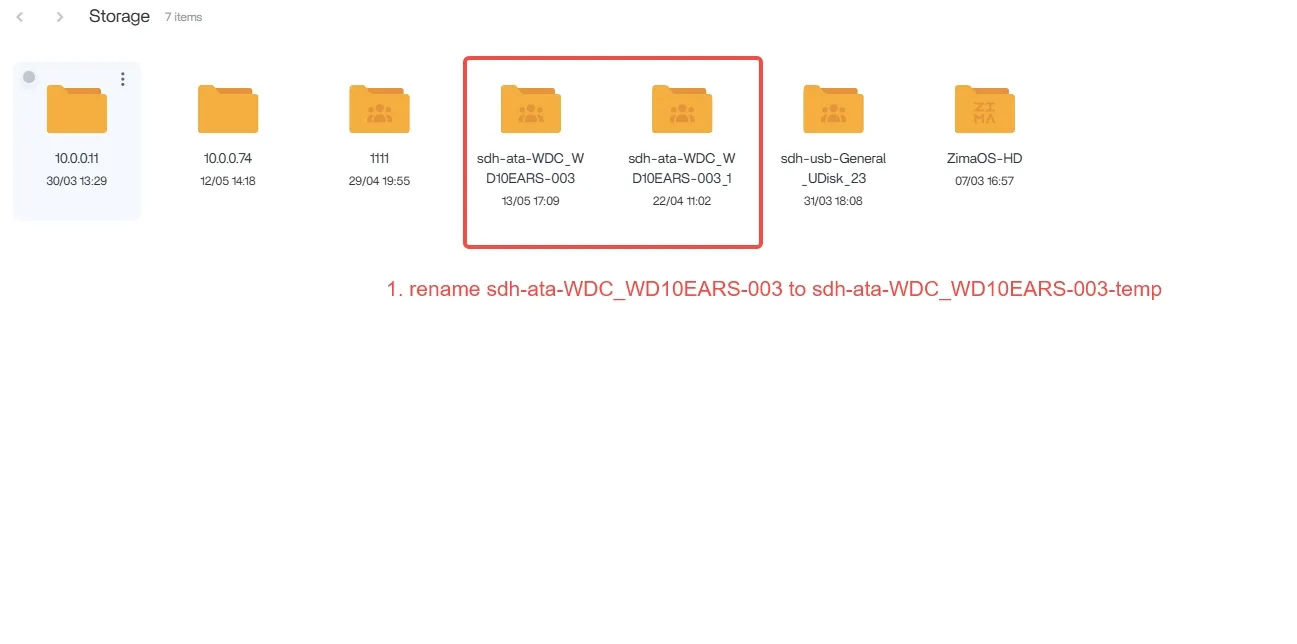
/media/sdh-ata-WDC_WD10EARS-003
/media/sdh-ata-WDC_WD10EARS-003_1
Where:
-
sdh-ata-WDC_WD10EARS-003is the original directory. -
sdh-ata-WDC_WD10EARS-003_1is the directory currently being used as the active mount point.
First, rename the original directory to a temporary name, for example:
sdh-ata-WDC_WD10EARS-003-temp
This frees up the original directory name, allowing you to rename the _1 directory back to its original name in the next step.
Step 2: Rename the Directory via Terminal
Log in to the ZimaOS terminal and switch to root privileges:
sudo -i
Then run the following command to rename the original directory to a temporary name:
mv /media/sdh-ata-WDC_WD10EARS-003 /media/sdh-ata-WDC_WD10EARS-003-temp
Replace the example path in the command with the actual directory name used on your system.

Step 3: Verify That the Original Mount Point Has Been Released
Return to the ZimaOS File Manager and confirm that the original directory name is no longer in use.
For example:
/media/sdh-ata-WDC_WD10EARS-003
At this point, the original directory should either no longer exist or should have been renamed to the temporary directory name, for example:
/media/sdh-ata-WDC_WD10EARS-003-temp
The purpose of this step is to ensure that the original directory name is available and can be reused in the next step.

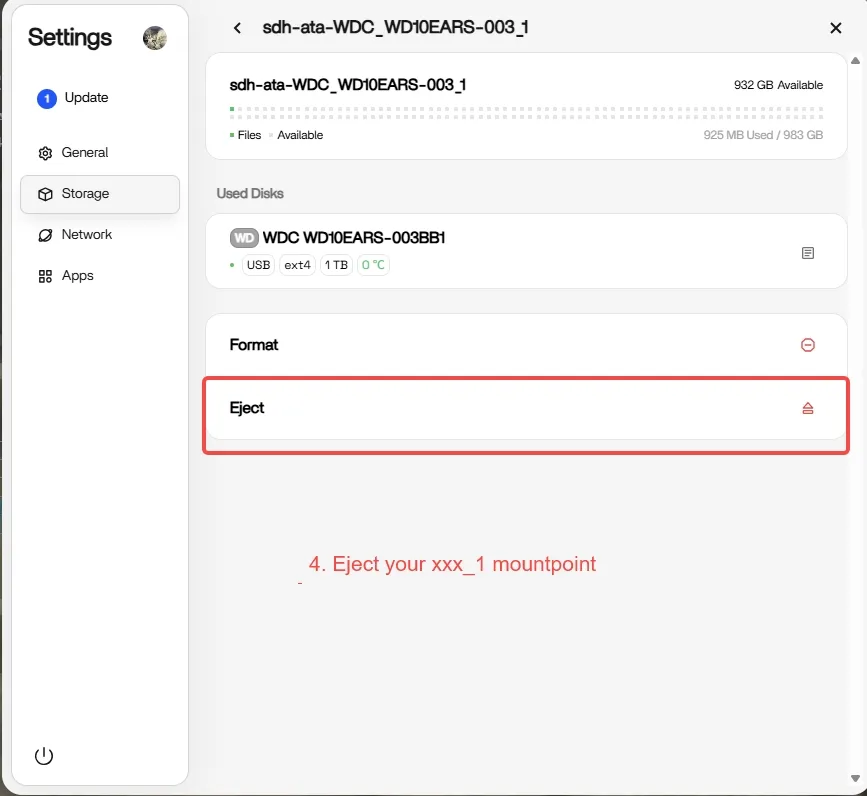
Step 4: Unmount the Current _1 Mount Point
Navigate to:
Settings → Storage
Locate the disk with the _1 suffix in its mount path, for example:
sdh-ata-WDC_WD10EARS-003_1
Click the disk and select:
Eject
Wait for the system to complete the unmount/eject process.
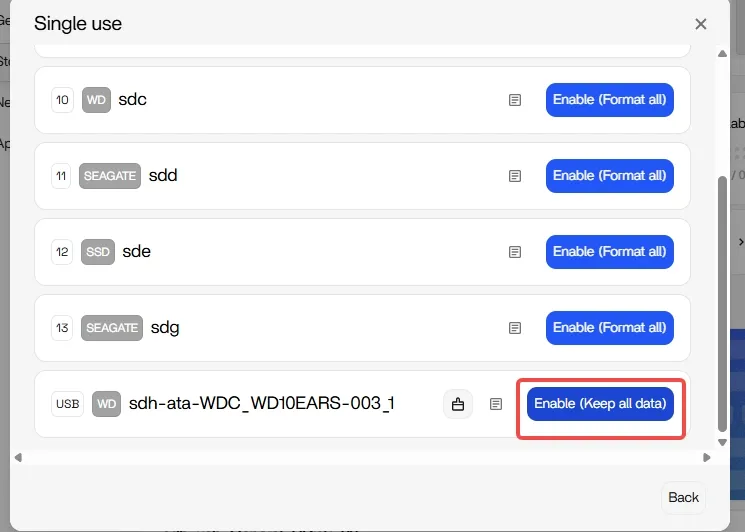
Step 5: Re-enable the Disk While Keeping Existing Data
After the disk has been ejected, return to the Storage page and click:
Create storage
Select:
Enable
Then locate the same disk and click:
Enable (Keep all data)
Important:
Be sure to select Keep all data and do not select Format all.
Choosing Format all will erase the disk and result in permanent data loss.

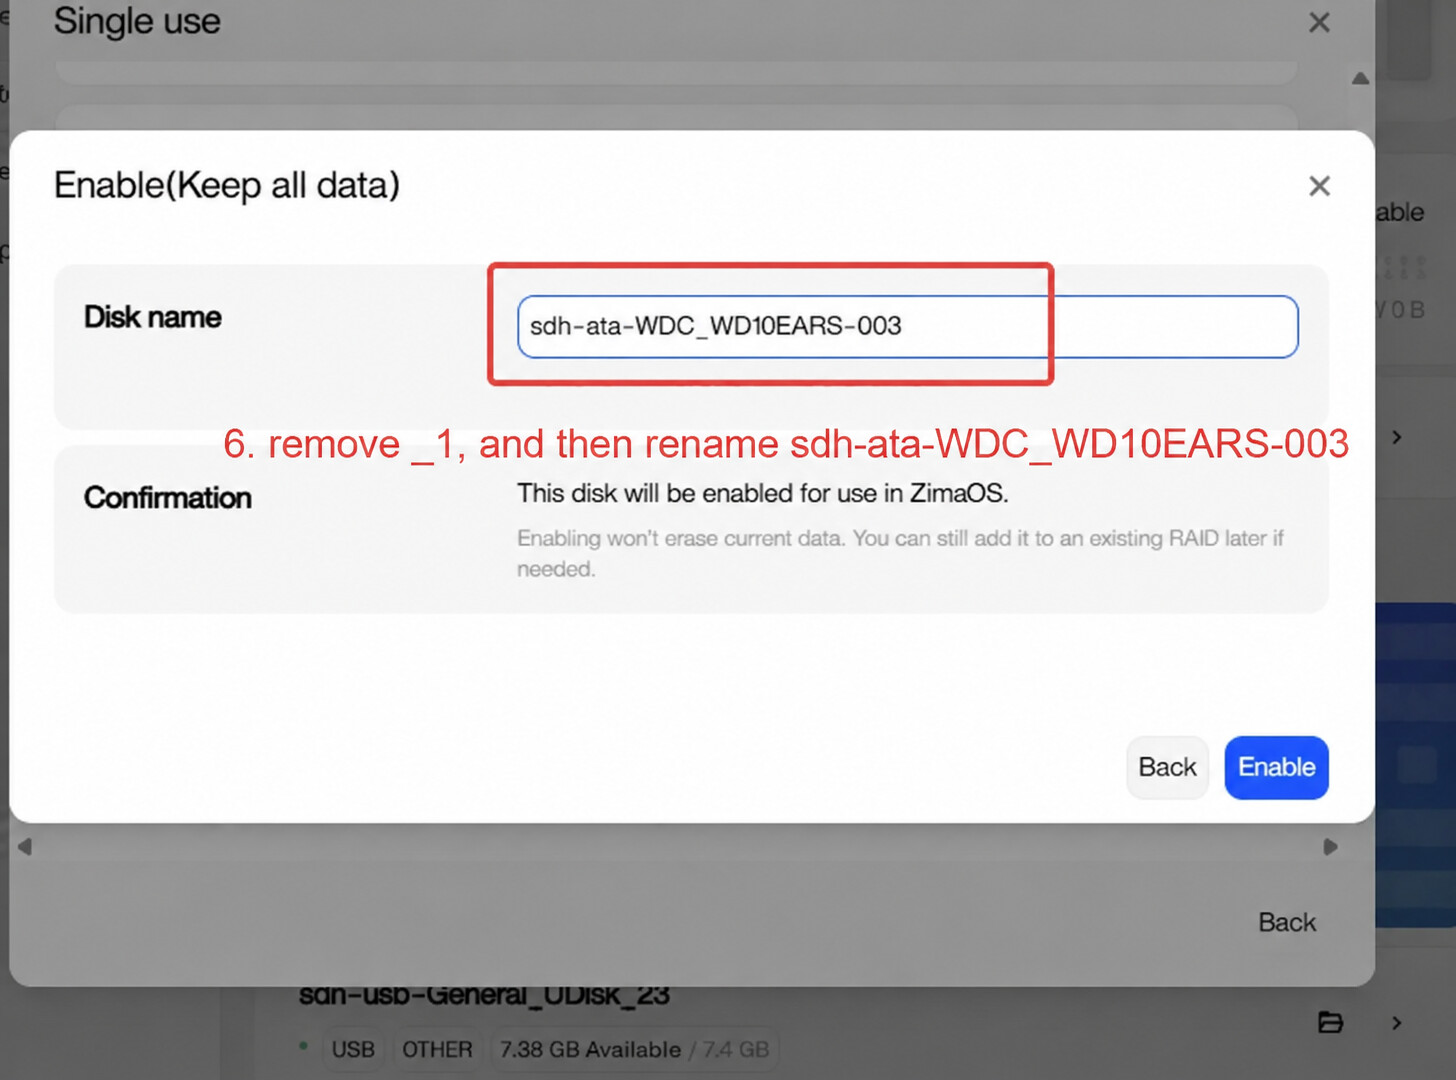
Step 6: Remove the _1 Suffix and Restore the Original Name
In the disk name field, remove the _1 suffix from the directory name.
For example, change:
sdh-ata-WDC_WD10EARS-003_1
Change it back to:
sdh-ata-WDC_WD10EARS-003
After confirming the name is correct, click:
Enable
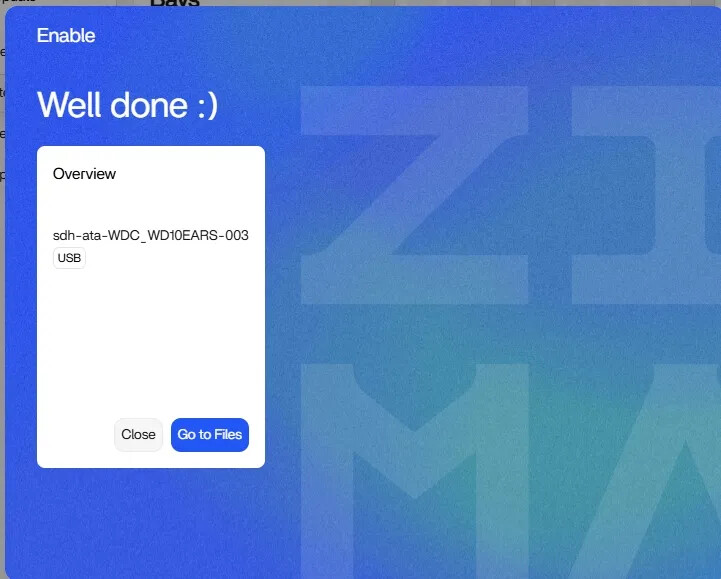
Step 7: Verify the Repair Is Complete
Once the disk has been successfully re-enabled, the system should display:
Well done :)
Return to the File Manager or the Storage page and verify that the disk name has been restored to its original name.
For example:
sdh-ata-WDC_WD10EARS-003
At this point, applications such as Plex, Jellyfin, Docker, Backup, SMB shares, and ZVM should be able to access and use the original storage path again without requiring path reconfiguration.

Note
After the repair is complete, we recommend keeping the -temp folder for a few days until you have confirmed that Plex, Jellyfin, Docker, SMB shares, and other applications are working correctly.
Once everything has been verified, you may safely remove the temporary folder if it is no longer needed.
Need Help?
If the issue persists after following the steps above, or if you are unsure about the current state of your storage and mount points, please contact our support team: ![]() dingwen@icewhale.org
dingwen@icewhale.org
To help us assist you more efficiently, please include:
-
Your ZimaOS version
-
A description of the issue
-
Screenshots of the Storage page
-
System logs (if available)
Our team will provide 1-on-1 support and help verify your storage and mount configuration to ensure your data remains safe.
We sincerely apologize for the inconvenience caused by this issue. Our team has identified the root cause and is actively working on a fix. We expect this issue to be fully resolved in ZimaOS v1.6.2 release to prevent similar problems from occurring in the future.
Thank you for your patience, understanding, and continued support of ZimaOS.