AzuraCast is a powerful, self-hosted, all-in-one web radio management suite. It allows you to run multiple online radio stations, manage playlists, configure AutoDJ, and explore many other creative broadcasting options.
Previously, I wrote a guide on installing AzuraCast using the ZimaOS GUI. However, after further testing, I found that the GUI method is unstable, and AzuraCast’s web updater does not function properly when installed that way.
In this guide, I’ll show you a more reliable method: installing AzuraCast on ZimaOS using the command line. This approach is significantly more stable, and web updates work correctly.
This tutorial is intended for home or private use, accessible within your local network or via Tailscale. If you plan to expose your AzuraCast instance to the public internet, you may need to configure additional network and security settings.
This method has been tested on both Zimaboard 1 and Zimaboard 2.
Let’s get started.
Step 1: Enable Developer Mode and SSH Access

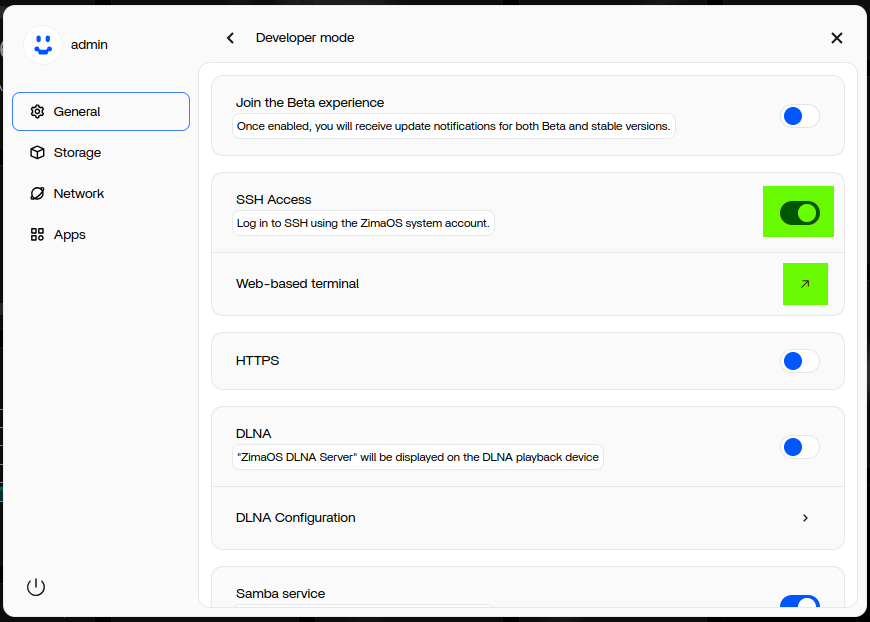
- Go to ZimaOS Settings → General → Developer mode
- Click View
- Enable SSH Access
- Click Web-based terminal
A new browser tab will open with the ZimaOS terminal interface.
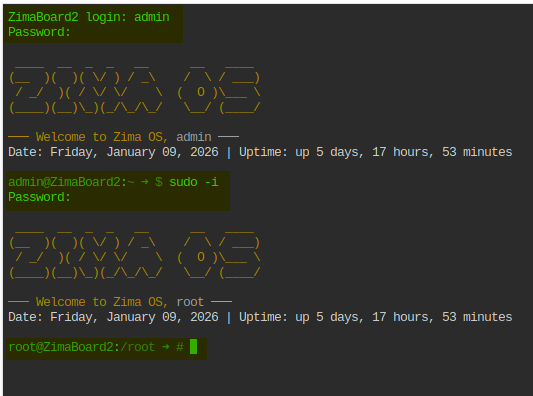
Step 2: Log In to the Terminal as Root
In the terminal:
- Enter your login username → press Enter
- Enter your password → press Enter
- Type:
sudo -i - Press Enter
- Enter your password again → press Enter
Now you are logged in as the root user.
Step 3: Create the AzuraCast Installation Directory
AzuraCast should be installed inside the AppData directory.
1. Go to your AppData folder
(Example path — yours may differ)
cd /ZimaOS-HD/AppData
2. Create an AzuraCast directory
mkdir azuracast
3. Enter into the directory
cd /ZimaOS-HD/AppData/azuracast
Step 4: Download and Run the AzuraCast Installer
Run the following commands:
curl -fsSL https://raw.githubusercontent.com/AzuraCast/AzuraCast/main/docker.sh > docker.sh

chmod a+x docker.sh

./docker.sh install
This will start the AzuraCast installation inside the current directory.
During installation, you’ll be asked to select several options, including port numbers.
Recommendation: Keep all default values unless you are confident about changing them.
Once the installation finishes, AzuraCast services and the web updater will be deployed.
Step 5: Fix Port Conflicts (If Any)
If any required ports are already in use, the installer will display an error showing which ports are conflicting.
1. Stop AzuraCast services
docker compose down
Wait until all services stop.
2. Edit the Docker Compose file
nano docker-compose.yml
When editing:
- Change only the left-hand side (published ports)
- Do NOT change the right-hand side (target ports)
Example:
8080:80 ← change 8080 if needed, keep 80
3. Save the file
Press:
- Ctrl + X
- Y
- Enter
4. Redeploy AzuraCast
docker-compose up -d
You may need to repeat this process multiple times, because Docker usually reports port conflicts one at a time. After fixing one conflict, it may detect another.
Once all conflicts are resolved, AzuraCast will fully deploy.
Step 6: Access the AzuraCast Web Interface
Open your browser and go to:
http://YOUR_SERVER_IP:80
If you changed the published port, replace 80 with your chosen port number.
Important Things to Keep in Mind
There are a few limitations when using this method:
- This installation cannot be managed via the ZimaOS GUI.
Editing or stopping it from the GUI may cause crashes. - ZimaOS dashboard will not display CPU or RAM usage for AzuraCast.
- All management and troubleshooting must be done via the command line or third party app with GUI such as Portainer.
However, despite these limitations:
- This installation method is much more stable
- AzuraCast web updates work correctly
- Better suited for long-term personal or home radio servers